
Oftentimes when working on a project we find ourselves in situations where we need to collaborate with other team members. Sometimes these team members have access to the same software that we are using, and other times they do not. In FastTrack Schedule 10 there are a variety of options for easily sharing your project with other users. We’ll have the choice of sharing data in both editable, and non-editable formats based on who we are sharing the project with.
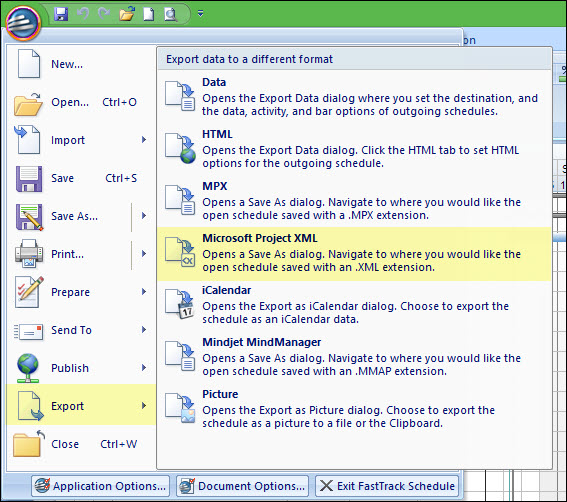
First, let’s take a look at some of the options we have for sharing non-editable versions of our schedule. Our first option is to share our project as an image. When we do this, the view (Schedule, Calendar, or Resource) and all data within it will be created as an image. To share our project as an image we can go to File > Export > Picture.

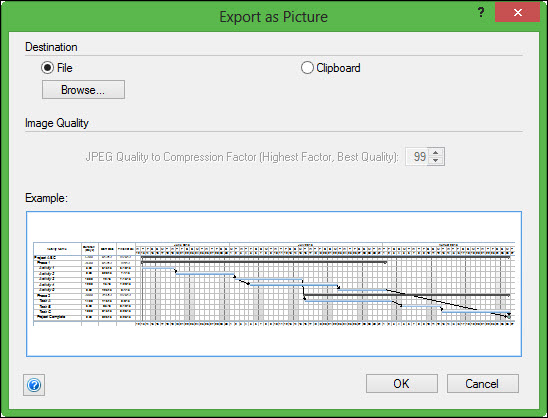
When we select to export as a picture, we will then see a Export as Picture dialog appear, which allows us to save the file and also shows a preview of what the image will look like. After we have selected where we want to save the file, select OK to create the image.
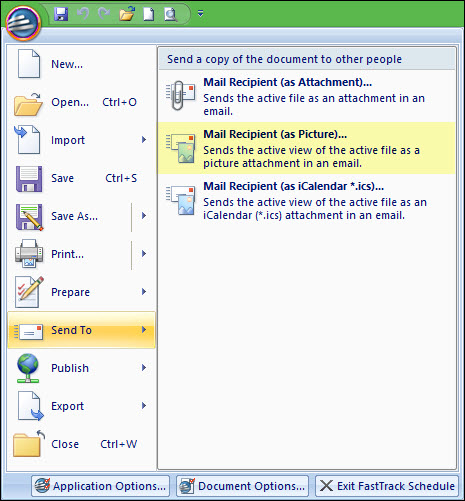
To then view the image you have created; navigate to the location you have saved it at and double click to open the image. To then share your image, you can easily add it as an attachment in an email. FastTrack Schedule 10 actually has an email function that will automatically create an image of your schedule and attach it to a blank email. To use this faster method of image sharing go to File > Send To > Mal Recipient (As Picture).
When we select this option a blank email is created with the image of our schedule attached. Now, all we have to do is enter a recipient address and type in a message.

Exporting our project as an image is one way we can share a static view of the schedule. But what about those situations when we need to share an editable version of the project with somebody who is using a different software, such as Microsoft Project. For these cases, we can export our project as specific file types that can easily be opened by MS Project and other software as well.
Exporting a project that can be edited follows similar steps to exporting an image. We can go to File > Export > Microsoft Project XML.
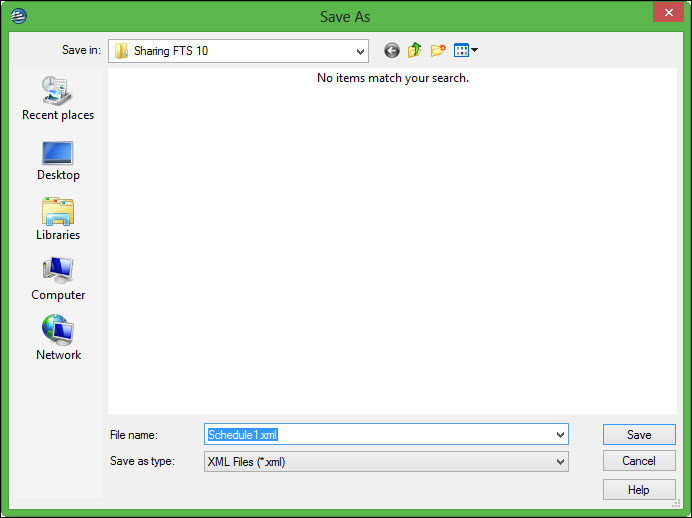
When we select this option, the Save As dialog will open, with the file type set to XML. Now, all we have to do is select where we wish to save the file and the name we wish to save it as.
When we export our data, the file will include all of the key data within our project so the other users can easily make updates without questions. Once our file is saved we can transfer to the end users through several different means such as email, saving it to a shared server, or cloud storage such as Dropbox. Once the other users have the file that can easily open and work with the data in MS Project or a variety of other tools.
Have you ever had the need to share a file, whether it was editable or not, with another user? Which method do you find to be the best to use when you are sharing your projects?
