
There are many different ways we can manage our projects. Some people may choose to use a traditional spreadsheet option such as Excel, while others may go for a more full-fledged project management tool. For those who choose to start with Excel, the option is always available to move the data into an application such as FastTrack Schedule 10.
In FastTrack Schedule 10 users can easily migrate existing projects from spreadsheets into new or existing files. To transfer data from Excel to FastTrack, we will save our file as Tab-Delimited or Comma-Separated Text files. When we transfer this data we can choose to transfer everything or only select columns based on our specific needs.
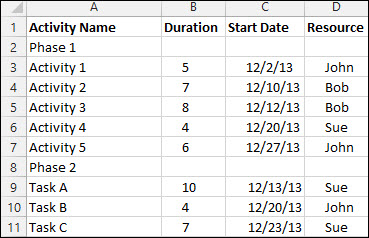
We start out with a simple spreadsheet, which in this case has been set up with specific columns for Activity Name, Duration, Start Date, and Resource.
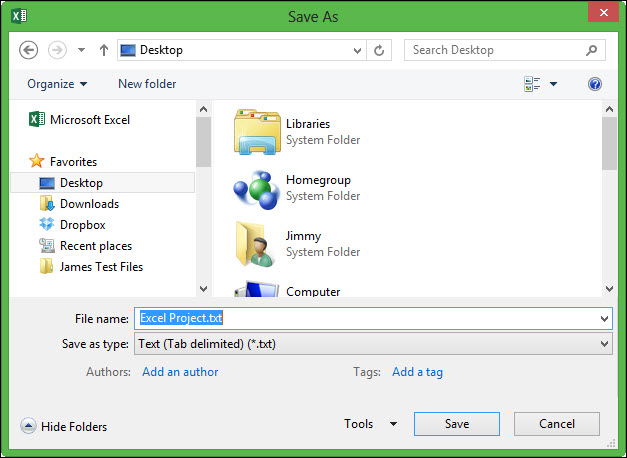
Once the spreadsheet is set up we can save off our text file. Go to File > Save As. In the Save As dialogue we can select the file type that we wish to utilize. In this case, select the option Text (Tab delimited) (*.txt). This will convert your spreadsheet to a simple text file which FastTrack Schedule 10 can easily read.
Once the file has been properly saved as a text file we are ready to import it into FastTrack Schedule 10. The first thing we need to do within FastTrack is open a new, blank file. From here we must set up our layout to reflect the appearance of our spreadsheet. This means that for every column visible in the spreadsheet an equivalent column needs to be visible within FastTrack. From our Main Layout we can do this by hiding the Finish Date column and inserting the Resources Assigned column.

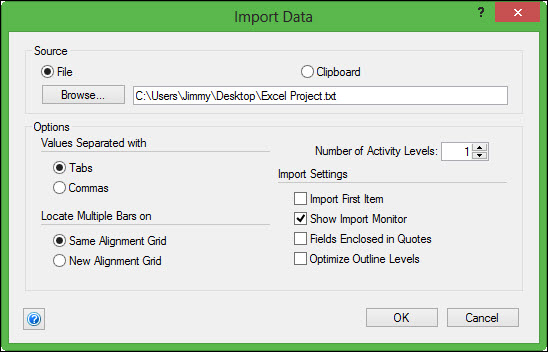
Now that our layout is built to display the correct data we can actually import that data into the file. Go to File > Import > Data. Select Browse to search your computer and locate your saved text file. By default, the Import Data dialogue will be pre-set with the best options to use. In this case, we will also de-select the option Import First Item as the first item in our spreadsheet was the column name, which is pre-populated in FastTrack.
Next, select OK which will begin the import and display the Import Monitor. The Import Monitor will allow you to import items one at a time to ensure they appear in the correct location.
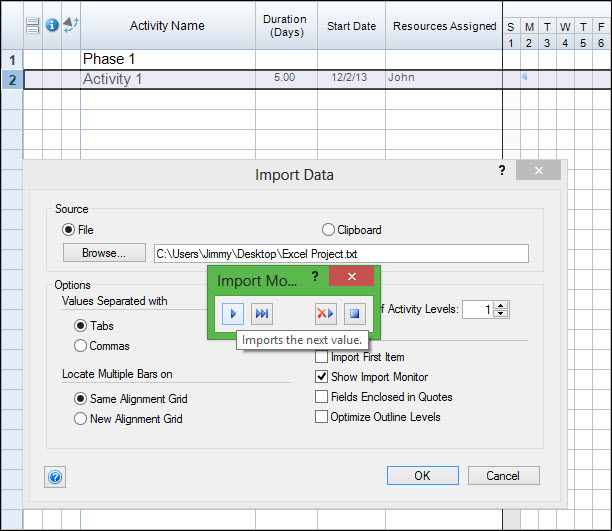
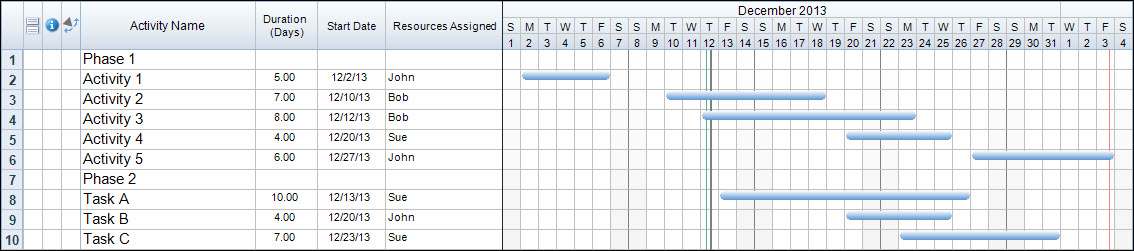
If everything appears correct for the first few items you can also select the Fast Forward button which will automatically import all the remaining data from the text file at once. As this happens, bars are created corresponding to the Durations and Start Dates that were entered in the spreadsheet.
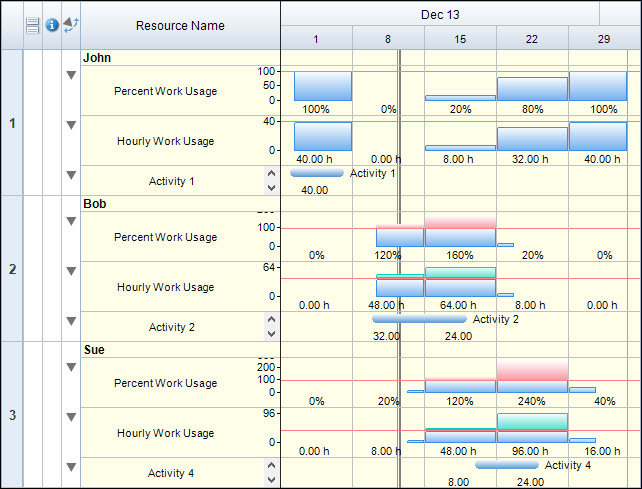
Since we imported data directly into the Resources Assigned column this also means that resources have automatically been created which we can then use to assign to other tasks within the project. We’ll even be able to view the workloads of these resource immediately within the Resource View.
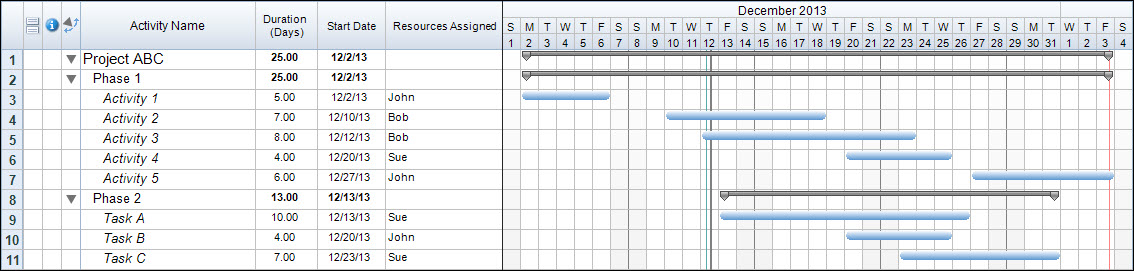
Finally, now that our project is imported we can go back and any additional detail that may have been missing within the spreadsheet. For instance, we can indent our sub-tasks to automatically calculate Total Durations for our phases. We can even add a top line for the overall project to calculate the project’s total Duration, Start Date, and numerous other points of key data within the project.
Now we have a fully functioning project built from the data we originally entered into our spreadsheet. From here we can continue to add additional tasks, assign resources, and even perform progress tracking. Have you utilized the Import Data tool to bring in a part or entire spreadsheet? How could this feature help you better manage projects that previously only existed within spreadsheets?
