
An important part of running any project is clearly communicating project details with the various resources or personnel that are assigned to the project. Depending on the size of the project it may not always be the best option to share an entire schedule with each individual resource. In these cases we can create unique reports to show only one specific resource’s assigned activities and share these customized schedules with the users in a few different ways. In FastTrack Schedule 10 the best way to accomplish this will be to create FastSteps, or combined sets of steps such as applying a layout, filter, or even exporting to a specific file type such as .ics or .jpg.
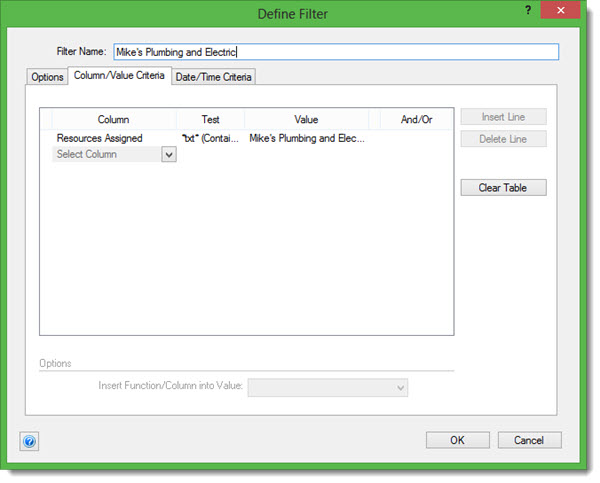
The first step in setting everything up will be to create filters for a specific resource in your schedule. To do this go to Project > Filters > Define. In the Define Filters dialogue select New which allows us to create a new Filter from scratch. Enter a customized filter name (such as the resource name), then switch to the tab labeled Column/Value Criteria. From the Column drop-down list select Resources Assigned, in the Test drop-down list keep the *txt* (Contains) option selected, and finally enter the Resource Name that the filter is for within the Value field. Then select OK to save the Filter and Close to close the Define Filters dialogue.
Now that we’ve created the filter we can begin to create our first FastStep. In this FastStep we will run the resource filter and then attach the file to an email which we can send to the desired user. This is a great option to use if the person you are sharing the schedule with also has FastTrack Schedule 10, as they’ll be able to easily open and view the file as well as make changes as needed.
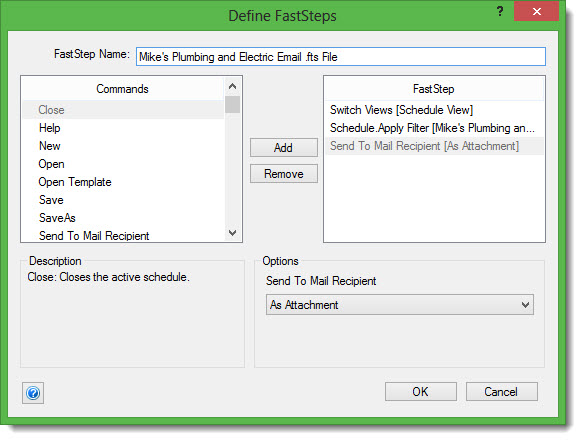
To start on Windows go to Tools > FastSteps and on Mac go to FastSteps from the main toolbar. While in the FastSteps window select New to create a new FastStep from scratch. Just like with creating our filter we can enter a FastStep Name corresponding to the purpose of the FastStep, for example we could enter something like “Resource Name” Email .fts File. After entering the name go to the Commands list and scroll down to the Control heading. Double-click on Switch View to add it to the FastStep. This will allow us to automatically switch to the Schedule View, no matter what other view we may be looking at when the FastStep is run. Next within the Command list, scroll down to the Schedule View heading and double-click the Schedule.Apply Filter. Select this option with the FastStep list then use the drop-down menu under Options to select the Filter that you wish to apply. Finally in the Commands list go to the File heading and double-click the Send To Mail Recipient option. Select OK to save the FastStep and Close to close the FastStep dialogue.
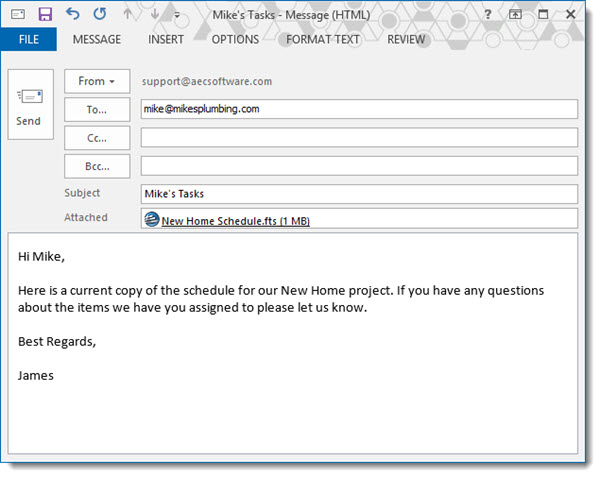
To then run the new FastStep and send a copy of the filtered schedule to a resource go to FastSteps and select the newly created option. When we do this the FastStep will apply the filter for the resource, save a copy of the schedule, and attach it to a new blank email. From there we can enter the recipients address and a message as desired.
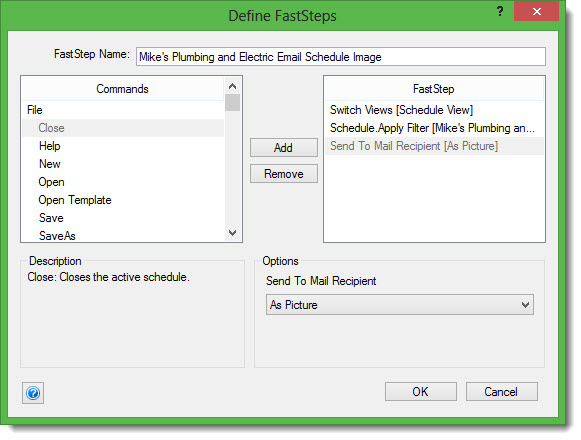
In the case of a resource who may not own FastTrack Schedule 10, we can use this same FastStep setup but instead attach an image of the schedule to the email. To start go to FastSteps > Define. With our previous FastStep created, we can easily make a copy and modify the copy for this new behavior. Select the FastStep from the list then select Duplicate. In the Define FastSteps dialogue enter a new name such as “Resource Name” Email Schedule Image. Now, all we need to do is select the last step, Send To Mail Recipient from the FastStep list. In the Options dialogue use the drop-down menu to change the selection to As Picture. Select OK to save the FastStep and Close to close the FastStep dialogue.
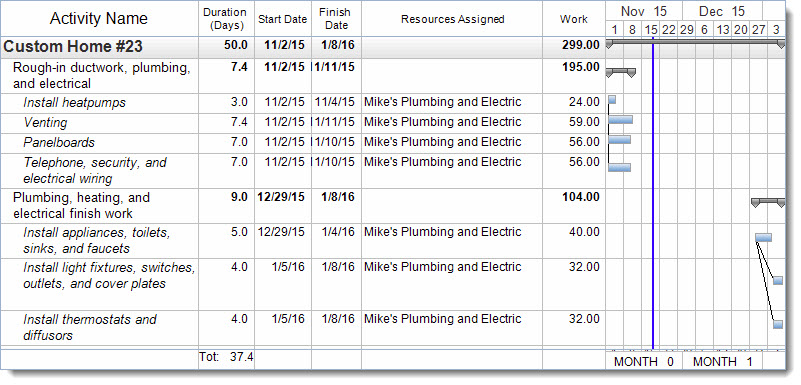
To then run the new FastStep and send a copy of the filtered schedule to a resource go to FastSteps and select the newly created option. When we do this the FastStep will apply the filter for the resource, export a copy of the schedule (all visible items) as an Image file (.png, .jpg), and attach it to a new blank email. From there we can enter the recipients address and a message as desired. Below we can see a copy of the image that is attached to the email.
FastSteps provide a very quick and efficient way of running individual resource reports and immediately sharing the reports with users as needed. How can setting up various Resource Reports with FastSteps help you save time and share essential project details with your team members?
