
When it comes to sharing your project with your resources, stakeholders, and clients, there are several ways to manage this. One of the most effective ways is to create a PDF. With FastTrack Schedule 10, you can easily create PDFs of your entire project, which can be shared for viewing or printing. A PDF allows you to lock in the detail and format of your project report, making it easy for clients to view and print.
Creating PDFs is slightly different between the Mac and Windows versions of FastTrack Schedule 10, yet it’s easy to do on both platforms. On Mac, we can use the built in PDF functionality, whereas Windows XP to Windows 8 it will require that a PDF Writer, such as Adobe Writer or CutePDF, is installed. Update: For users on Windows 10, Microsoft now offers a built in Print to PDF utility.
The first step to creating a great PDF project report is to set up your data to display the necessary information using Layouts and Filters. These will allow you to control exactly what data is being displayed, based on who you are sharing your project with. For information on working with Layouts, take a moment to view our “Reporting project details with layouts” (Mac | Win) video tutorial.
Next, we can switch to Print Preview, where we can make changes to the current formatting of what our PDF will look like. When formatting our PDF, especially for sharing with a print shop for large format printing, we want to set the paper size according to what will be used in the final production. This ensures that when you send the file for printing, everything is formatted ahead of time and no adjustments need to be made on the fly. To set up your paper size and orientation, go to File > Print Setup on Windows and File > Page Setup on Mac. Once the changes have been made to the orientation and paper size, everything’s ready to create your PDF.
Mac users, go to File > Print. From the lower left hand corner of the Print Dialog, select PDF > Save as PDF. Here you can enter the file name, title and author of the PDF, and even apply security preferences such as a password.


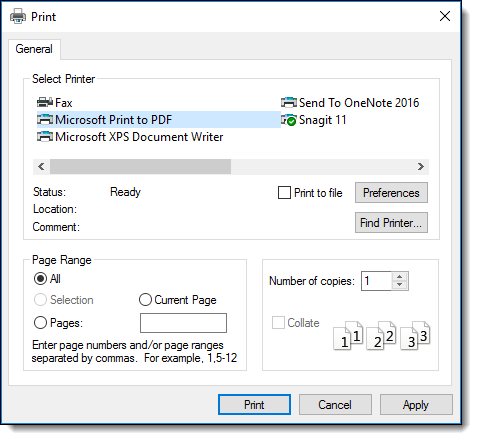
Windows users, go to File > Print. Within the “Select Printer” section of the Print dialog, select the PDF writer that is currently installed on our system. In the example below, we are using CutePDF Writer.

Update: Users on Windows 10 can also go to File > Print then within the Select Printer section choose the Microsoft Print to PDF option.
You can then select Print, which will open a Save as Dialog, where you can name your new PDF file and the location to which it will be saved.

Now that you’ve created your PDF file, you can easily share it with others who will be able to view your entire project without making changes to the data. Since we also took the time to set up our paper size and orientation, the print shop can now create the exact print out.
Have you ever run into a situation where you wanted to share your project with others, on a read-only basis where creating a PDF would have been useful? Let us know.
