
FastTrack Schedule 10 offers many different ways for interacting with the data throughout our schedules. Some of the simplest tools can often provide the greatest functionality for being able to quickly switch back and forth between how data is accessed within schedules. Today, we’ll take a closer look at the 3 Action Columns that FastTrack Schedule 10 offers, and see exactly how they can be utilized within our own projects.
The first Action Column that we see is the Page Break column. This allows users to place page breaks, for printing purposes beside a specific activity. To place a Page Break, simply select in the action column corresponding to the row number.

When we then switch to Print Preview we will see that rows up until that point will appear on one page, and a break will then be created to move additional rows to the next page of your printout. Using the Page Break Action Column allows us to easily define exactly what data should appear from one page to another on our printouts.

The second Action Column Is the Information Form column. This allows users direct access to the selected rows Activity Information Form. In this form we can view activity data such as Progress Tracking, Columns, Links, and Resource Assignments.

At times, we may see icons such as the Note icon appear in the Information Form column. Anytime we see a note icon, it indicates that some form of note has been entered into FastTrack Schedule 10’s Notes column. If we click on the icon, the Activity Information Form will open directly to those notes, so we can view any important information that may have been added to the activity.

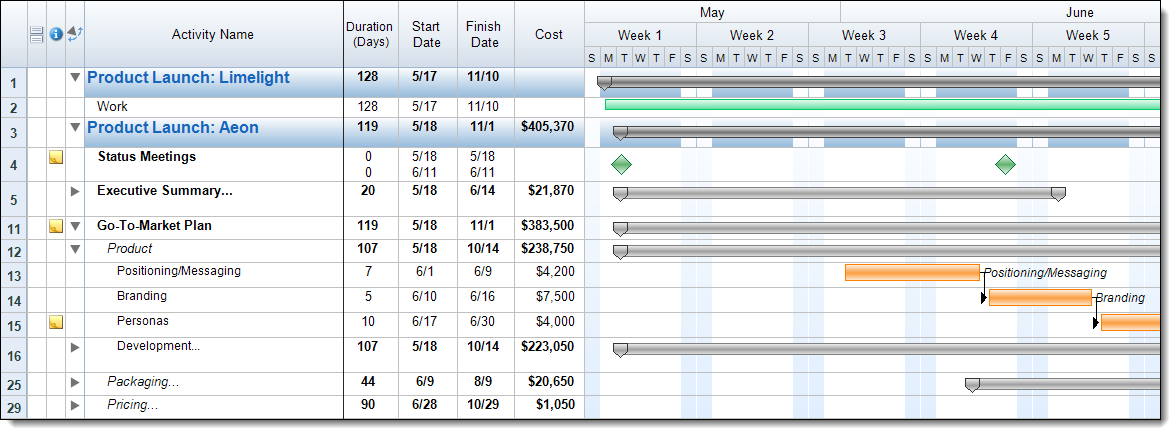
The final Action Column is the Expand/Collapse column. This allows users to either expand or collapse summary rows to show different levels of detail within the project. By using Expand/Collapse users can quickly move between viewing data at several different levels within their projects.

To use the Expand/Collapse column, simply select the triangle beside any parent or summary row, this will automatically collapse the data, so you only see the summary at its highest level. We can once again select the same trial to expand the outline and show all data within the parent or summary row.
While working in a schedule, users have the ability to show or hide any of the Action Columns if the choose not to work with them. In order to show or hide Action Columns go to View > Action Columns. You can then toggle specific columns, or choose to show/hide all of the columns at once.
Action Columns provide shortcuts for different interactions within the schedule and allow users to modify what data is being displayed without having to move away from the schedule. Have you utilized any of the action columns to interact with data in FastTrack Schedule 10, if so which columns do you find to be the most useful?
