As we work on our projects there is usually a wide range of data that we need to manage. Being able to quickly and easily access that data can be vital when trying to make updates to an existing project or entering data into new projects. FastTrack Schedule 10 offers numerous avenues to easily access all of the data in your project. We’ve already taken a look at some of the various Columns that FastTrack Schedule 10 offers, today we will focus on a tool known as the Information Form.
The Information Form will allow you access a wide range of information including: Dates, Durations, Progress Tracking, Dependencies, Resources, and many additional types of activity information. To access the Information Form while in the Schedule View simply double- click on any Activity Bar, you can also access Information Form by clicking in the Information Action Column located by the row number. As soon as we do this, the Information Form opens to the Bars tab displaying various Tracking information.
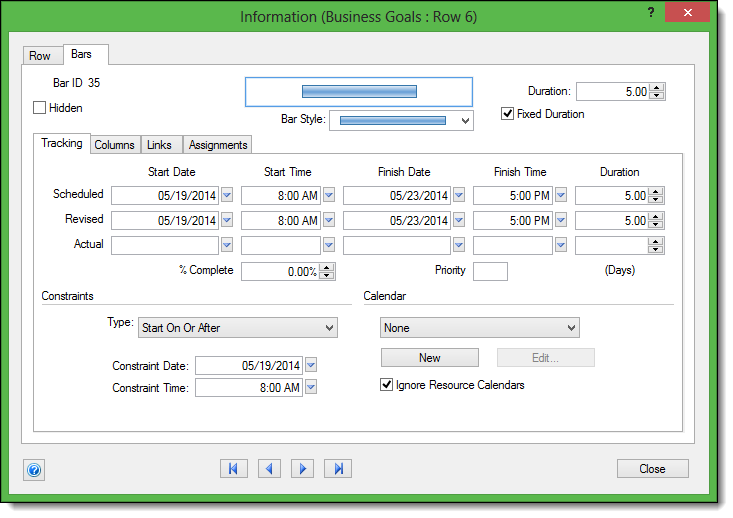
The Tracking Tab displays all information pertaining to Progress Tracking: Scheduled, Revised, and Actual Dates and Durations. At any point, you can easily update a task by interacting with any of the Tracking fields. In the image below we have quickly updated the task “Business Goals” to be 100% complete.
![]()
The Tracking Tab will also display information relating to the task’s Constraints as well as the Calendar. The Constraints field will allow us to quickly switch how the task will interact with other tasks in the project, while the Calendar field allows us to assign, create, or modify a calendar specifically assigned to this one task.
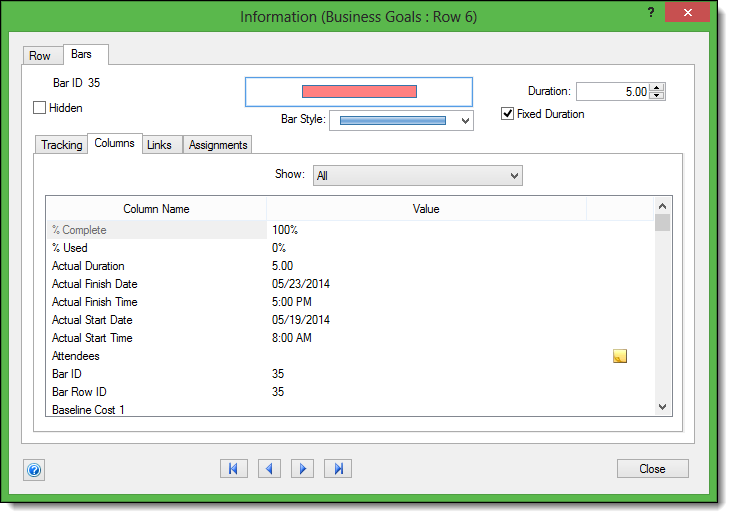
The second tab in the Information Form is Columns. This tab will allow you to view a list of all columns that are stored “per bar” for the activity. These columns can include items such as Dates, Durations, Calculations, Costs, and even Work. As you update any information that appears within these fields, the changes are automatically made in the corresponding column for that task as well. If you choose to view the column at a later time it will reflect the new information you have just entered.
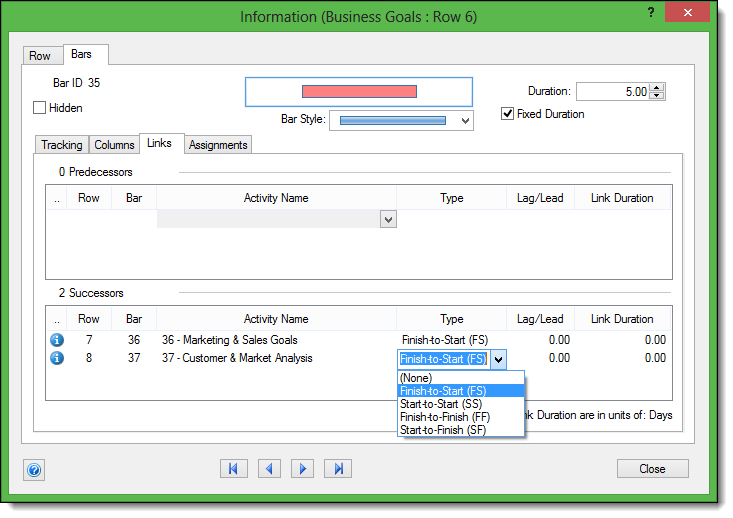
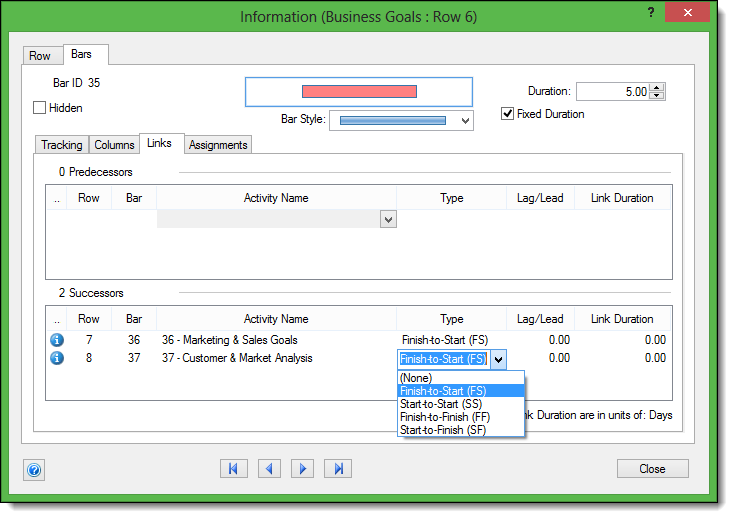
The third tab in the Information Form is for Links. This will allow you to view all of the existing Predecessors and Successors that the selected task has. You’ll be able to modify the type of link that is used and even account for lag or lead between your tasks. Along with modifying existing links, you’ll also be able to add new links between tasks by manually entering the row number or using a drop-down list to select the activity name.
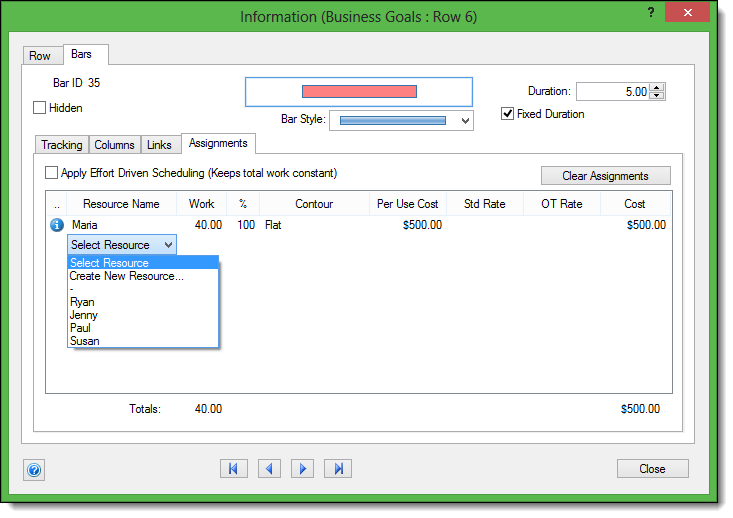
The fourth and final tab that is available in the Information Form is Assignments. This tab shows all currently assigned resources, as well as their corresponding information such as Work (Hours), % Effort, Work Contour, and Cost Information. Using this view you can easily update the amount of effort a resource applies to the task, or even assign a Per Use Cost specific to that one task.
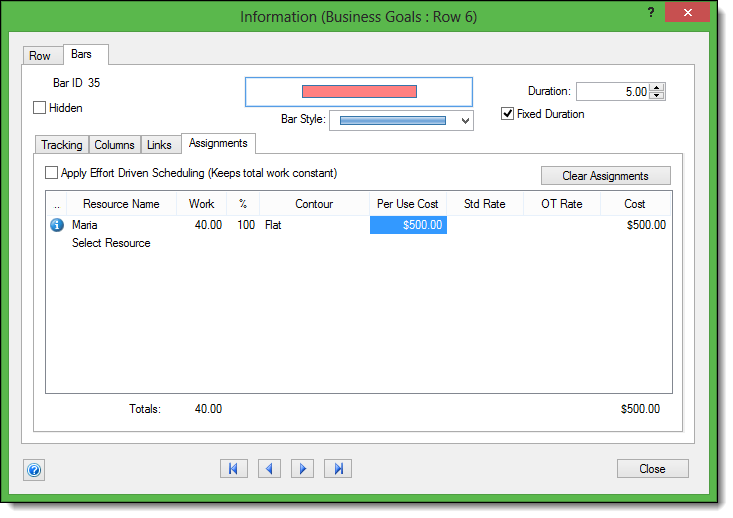
In addition to modifying the existing resource work, you can assign or even create brand new resources to work on the task. When using the Select Resource option a drop down menu will be displayed with all of the resources that are currently in the file (in your Resource View). This will allow you to easily select which resource to use without having to manually type the information in.
When you’re done working on one task, you can use the navigation arrows at the bottom of the window to cycle to additional tasks. The arrows allow you to cycle to the First Task, Previous Task, Next Task, or Last Task in your project respectively.
The Information Form can be a great tool to utilize in order to quickly access various types of data for your tasks. It will allow you to easily update tasks and even add new data to them. How can you use the Information Form to make the entry of data in your projects a quicker and more efficient process?
