Let’s take a look at how to setup the Layout and Columns utilized in our Budgeting with calculation columns Quick Tip Video. This video shows how to use Budget and Cost columns in your schedule, and how to use calculation columns to automatically track the variance between these values.
Start by creating a new Layout where we can add in all of our various cost data. To create the new Layout:
- Go to Layouts > Define.
- Select the Basic Layout.
- Select Duplicate.
This creates a copy of the existing Basic Layout, which contains the Activity Name column and Timeline Graph.
The Define Layout dialogue box is now open, customize the new Layout by:
- Fill in the “Layout Name” field with a custom name, such as Budget Layout.
- In the Columns Shown section, browse the Available Columns list and select Cost 1 and Cost 2 and move them to the Shown Columns list with the Show button.
Note: To add both columns at once select Cost 1, hold down the Shift Key, and then select Cost 2. Next press the Show button to move both columns to the Shown Columns list. - Press OK to close the Define Layout dialogue box.
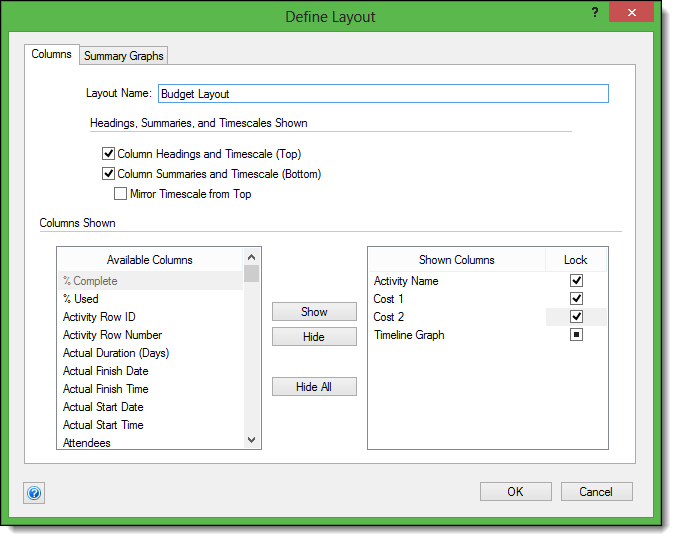
Select OK once again to switch into the newly created Budget Layout.
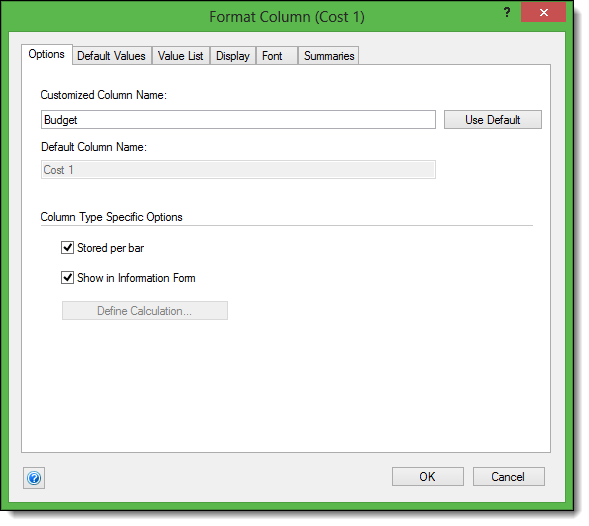
Now let’s rename the two new Cost columns (to “Budget” and “Cost”) we just created so we know what the new columns are for.
- Double-click on the column header for Cost 1.
The Format Column (Cost 1) dialogue will open. - In the Customized Column Name field, type “Budget.”
- Click OK to save and close the dialogue.
- Repeat steps 1-3 for the Cost 2 column’s new name (Cost).
Note: Since we used a Cost column to create the two new columns, all the column options are pre-set for us and the column will work the way we need it to.
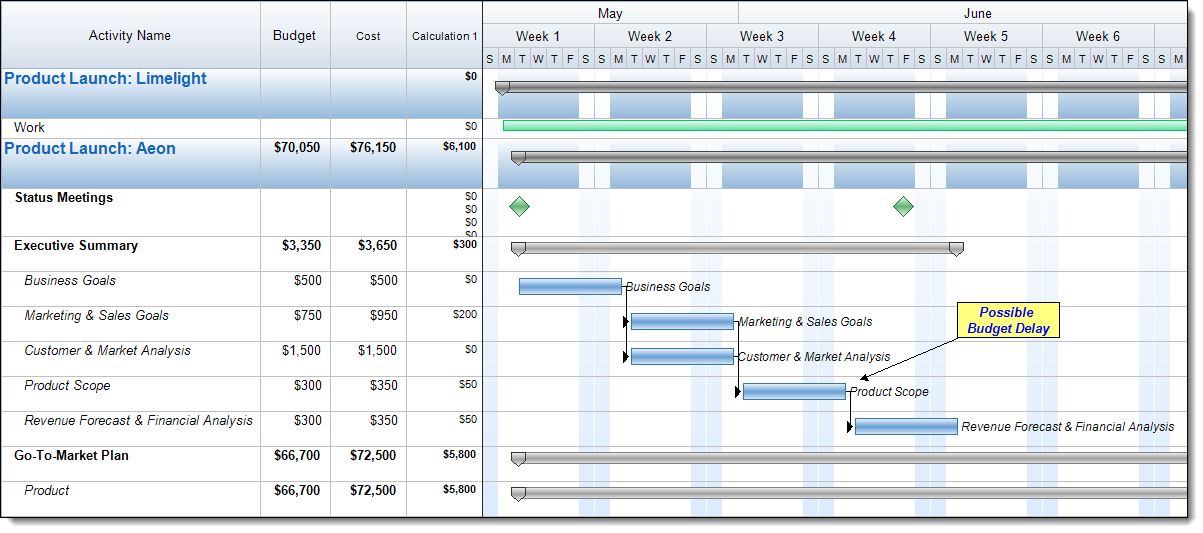
Once we’ve set up our Cost column to appear as we’d like we can then input our Budget and Cost values for the activities in our schedule.
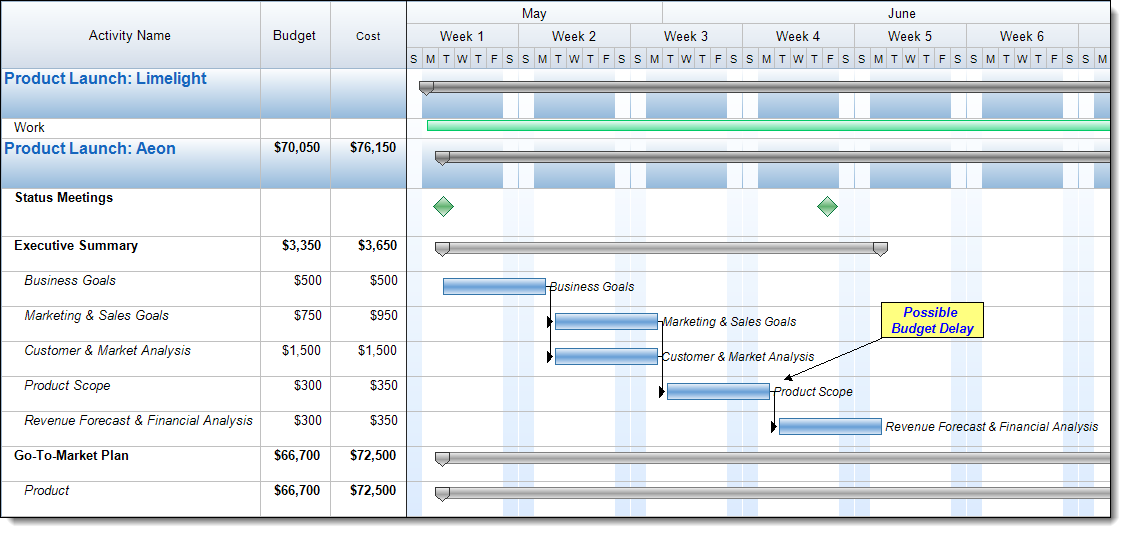
As we enter this data, it’s easy to see that there are variances between some of the values. We don’t want to have to manually calculate these values for each task so our next step will be creating a calculation to do this for us. To start we need to insert a new calculation into the schedule. Go to Insert > Column > Calculation 1. After this is done the column is immediately added to our schedule and the Format Calculation dialogue opens. Here we can create our simple calculation: [Cost] – [Budget]. This will provide us the variance between the two values.
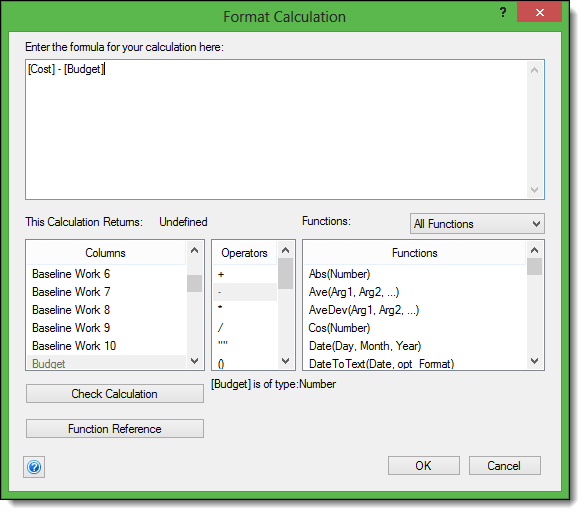
Once we select OK, the calculation will be placed into our schedule and will automatically display the variance between our Cost and Budget columns. Just like with our Cost columns if we wish to see a different name displayed, such as Variance, we can double-click on the column header and change the Custom Name.
By using the customizable Cost and Calculation columns in FastTrack Schedule 10 we can easily add in and track a wide variety of project costs. In addition to tracking values such as a simple Variance, Calculations can also be used to single out only Over Budget Activities, or even display dynamic text labels on bars. For additional information on these calculation options please see our blog post: Using Calculations to Find Cost Variance.