While FastTrack Schedule 10 can display a detailed Gantt chart of everything that happens within a project, one graphical view that is not displayed is the Work Breakdown Structure or WBS. Normally, the WBS displays the hierarchical breakdown of the project according to its phases or deliverables. Even though FastTrack does not have a graphical display of the WBS it is still possible to view and utilize the WBS coding that is assigned to each activity throughout the schedule.
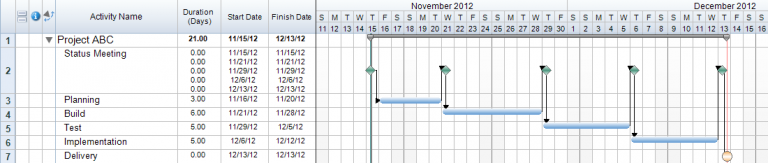
The WBS coding will automatically number activities in a sequential order according to the hierarchy of those tasks. This allows users to easily identify the outline and order of tasks by viewing simply the code displayed. Normally when we view a schedule, as we see below, we only see a simple Row Number that is displayed to indicate the order of the activities. However it is possible to add or even modify how the WBS coding will be displayed in a project.

To view the WBS coding in FastTrack we can simply add the column into our schedule by going to Insert > Column > WBS. As we can see, the WBS helps to easily identify the hierarchy level of each task in the project. For example, when we look at the task “Product Scope” we see the value 2.2.4. Since there are 3 digits this represents that it falls on the third outline level. The first value “2” indicates that this falls within the second group within the first outline, the second “2” indicates that it is the second heading within the second group, and finally the “4” represents that it is the fourth task in that outline location.

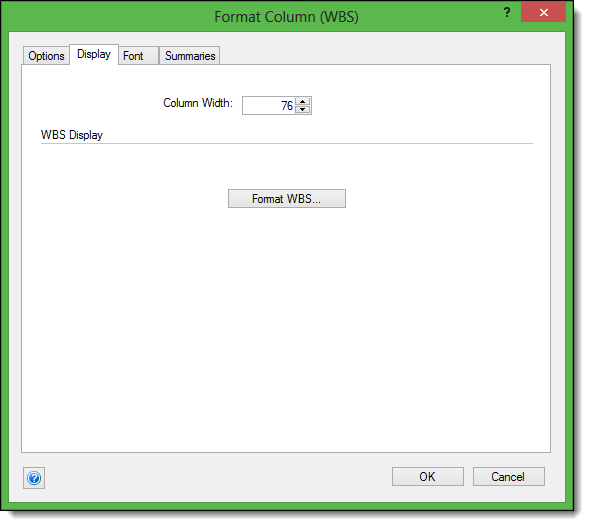
Now that we can visualize the WBS coding, let’s take a look at how we can modify the display. To do this double click on the WBS column header, then select the Display tab and the Format WBS… option.
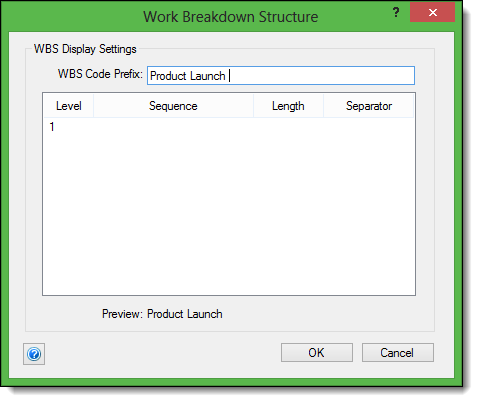
This will open the format Work Breakdown Structure dialogue. Here we can modify items such as the WBS Code Prefix: which will appear before the first displayed number in the WBS coding. For the prefix, users can enter a number, letter, or entire words. For example, we can enter the name or project or even the lead manager. Each time we modify the code, the preview at the bottom of the dialogue will update to show us how this will appear in the schedule.
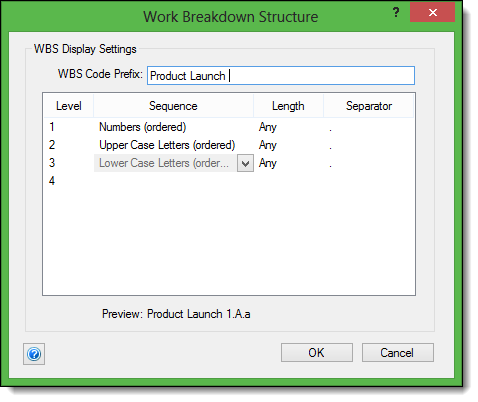
After setting the Prefix, the next option is to set up how each coding level will appear. Here we can select how the sequence starts, such as with numbers or uppercase letters, the length at which the sequence would repeat, and the separator used before the next code level. Just as with modifying the prefix each change we make is displayed in the preview.
After setting up the WBS coding as you wish it to appear select OK, then OK again to close the dialogues and apply the changes in your schedule. Now, when we view the schedule we can see the WBS coding displayed as we have chosen.

By displaying and modifying the WBS coding with FastTrack Schedule’s WBS column users can easily customize the hierarchical coding in their schedule. Do you currently use the WBS column in its standard format, or have you modified the coding to better fit your needs?