
Accounting for and tracking non-working time in projects can be just as important as tracking when activities occur. For this reason, the way we display our non-working periods in a schedule can be key, especially when sharing schedules with other users. FastTrack Schedule 10 offers several options for how users can format and display non-working time throughout their schedules.
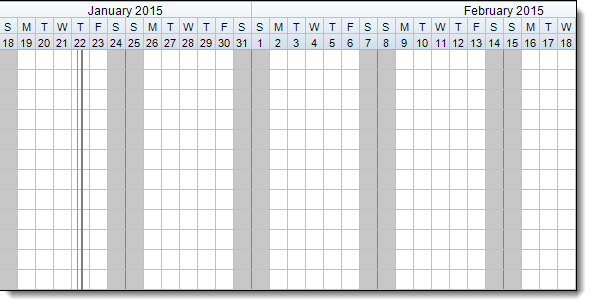
First let’s take a look at the default option for shading non-working periods. In the example below we are working from the default calendar, where only Saturday and Sunday are defined as non-working days. As we can see, each Saturday and Sunday that is visible is shaded gray. This shading is used to represent non-work, and the fact that if an activity covers this period of time no work will occur during those days.
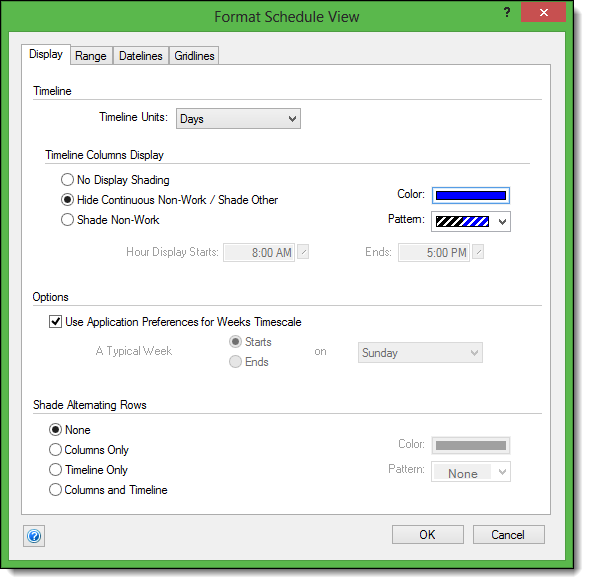
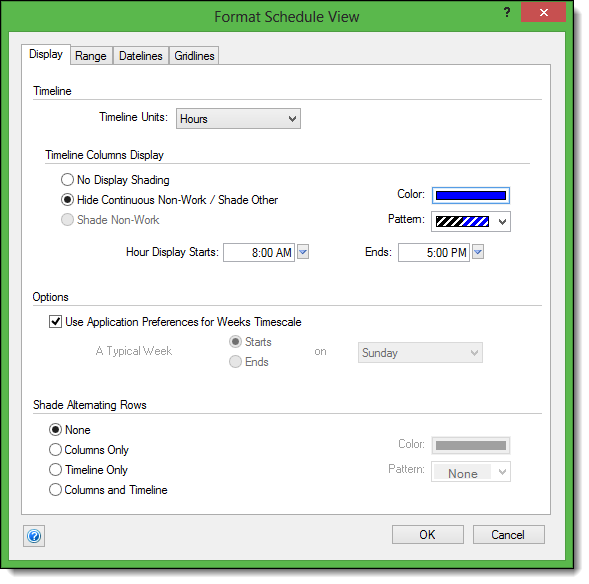
To access non-working time display options go to Format > View. You can also Right-Click or Control-Click in the Timeline Graph and select Format Schedule View. Doing this will open the Format Schedule View dialogue where there are various options for controlling how the Timeline Graph will be displayed.

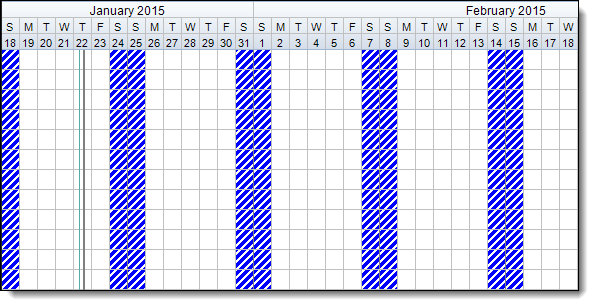
The first option that we can focus on is the currently selected option, Shade Non-Work. By default this option will shade all non-working days in the schedule, whether they are defined as typical non-working days or exception days within our work calendar. The main option for this setting is to change both the color and pattern that is displayed in the Timeline Graph. This will allow us to either draw more or less attention to these non-working days. After choosing a new color or pattern, select OK to apply it to your schedule.
The second option in the Format Schedule View dialogue is Hide Continuous Non-Work/Shade Other. This option will allow you to hide all continuous non-working periods in the schedule, such as Saturday-Sunday. However, it will still display any individual exceptions that may have been entered, to better highlight their variation from the standard working day.
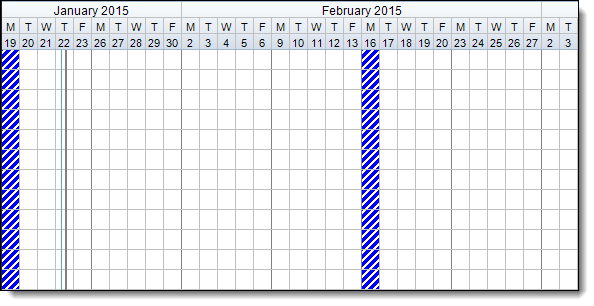
In this option we can see that every Saturday and Sunday is now completely hidden from view, and any individual calendar exceptions – such as January 19 or February 16 – are now highlighted within the Timeline Graph. By using this setting we can fit a larger amount of data into a smaller space which is very useful when we are printing our schedules.
The Hide Continuous Non-Work/Shade Other also offers additional functionality when the Timeline Graph is displayed in units of Hours. When the Timeline is set to Hours, users have the ability to control exactly what hours within the day are actually displayed in the Timeline Graph. The default option here is to show the starting time at 8:00 AM and ending time at 5:00 PM to fit around the default (8 – 12) (1 – 5) day structure that FastTrack uses.
When we apply this setting while in hours, we can now view every working hour within the day, as well as a shading at the 12 PM hour to reflect the non-working time during that period.

The final option in the Format Schedule View dialogue is No Display Shading. This option will provide no shading on any type of non-working day throughout the schedule. In this case all days including Saturday and Sunday are displayed in the Timeline Graph. This setting is often used to provide a “cleaner” look or feel when creating reports for a schedule.

That covers the options for formatting the appearance of non-working periods in the Timeline Graph. How can utilizing any of these options help you to better convey which dates are set as working vs. non-working within in your own schedules?
