Throughout many of our Tip blog posts, we have looked at the different options we have for adding features and functionality to a schedule. But, what happens to all those great Layouts, Filters, and Summary Graphs you’ve added to your schedule once your project is completed? Are you going to have to create them again for your next project? The answer to this question, is no.
In FastTrack Schedule 10, you don’t have to reinvent the wheel when scheduling a new project. You can easily create template files that transfer all of the customized features you’ve built into our schedules. You can even transfer the Activity Data from old projects as well. Using templates to create new projects is quick, easy, and greatly reduces the amount of time it takes to get up and running. The other benefit is that your schedule will have a familiar look and feel, which can make your next project easier to work with.
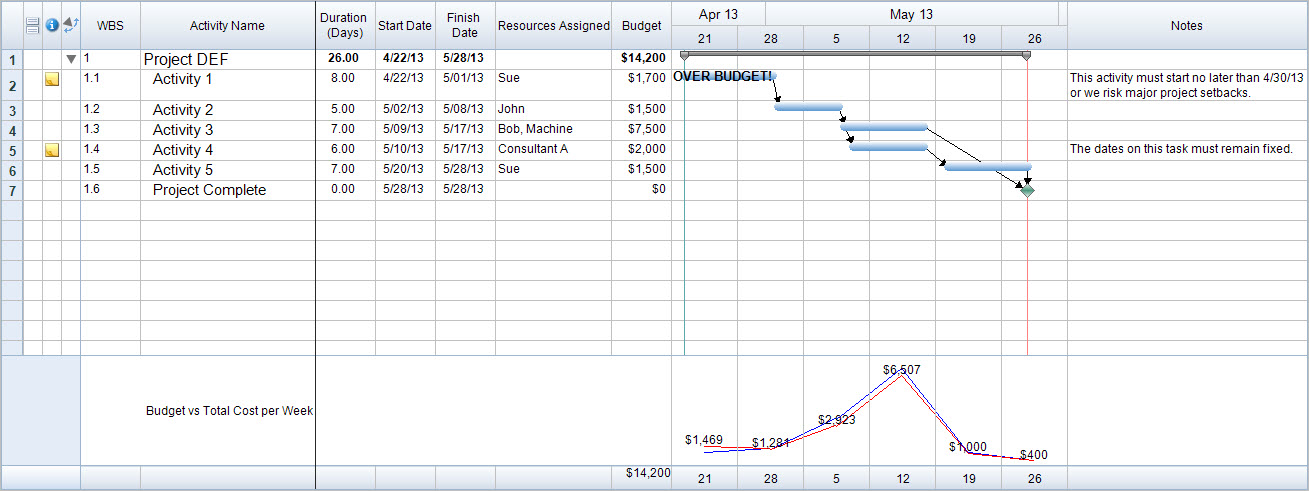
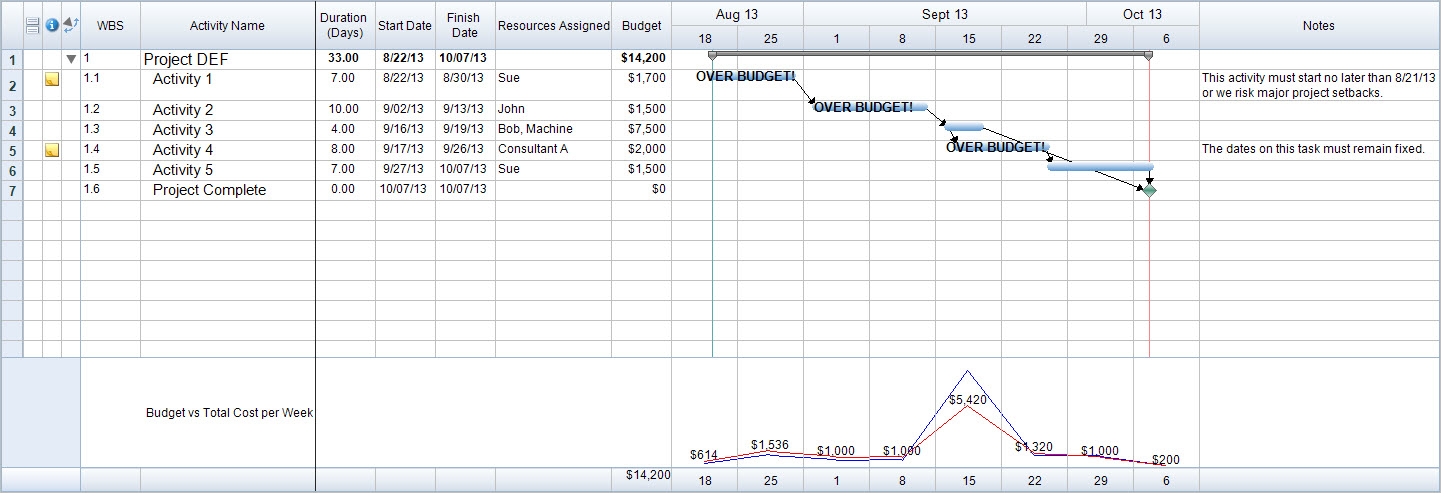
The first step in creating a template file is to add all of the features that you would like to use in your file. In the image below, we have built in features such as Customized Columns, Layouts, Filters, Resources, and Summary Graphs.
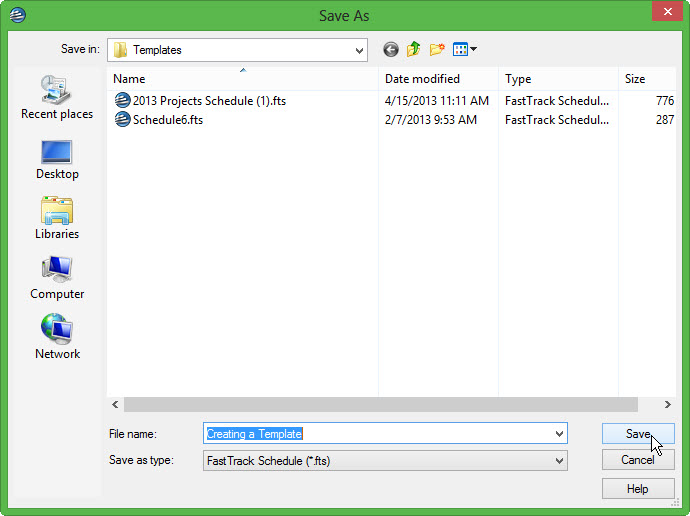
Once you’ve added all of the desired features to the file, go to File > Save as Template. When we save the file as a template, it will be saved into a “Templates” folder that will allow FastTrack Schedule 10 to add it to an easy-to-use Template menu.
Now that our template is saved, it will be available anytime we’d like to create a new file with the same list of features. To create a file from the template, first open a brand new blank file by going to File > New. This will launch our Getting Started dialog where we can select New Schedule from Template.

When we select New Schedule from Template, we’ll be taken to a screen for Templates and Examples. Our newly saved template will appear in the Templates list, since it was saved via the Save as Template dialog. From here, we can select our file and select OK to move to the next screen.

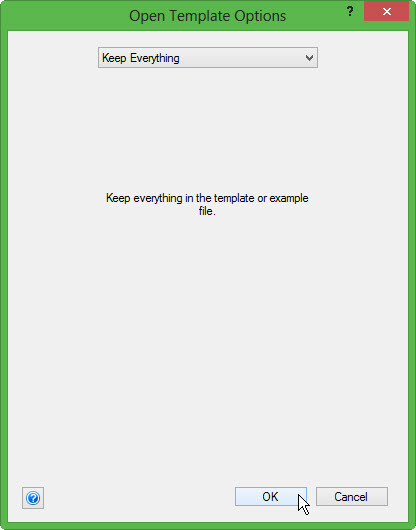
The next screen will give us options for opening the template. Our first option is Keep Everything, which will maintain all of the features and data that we have added to the file. Select OK to open the template with all of the original data.
When we select OK, a new file will open that will look exactly the same as the original file we have save. However, we know that this is actually a new file given by the generic file name (ex. Schedule1). This file will contain everything that was in the original file including; Column Data, Resources, Custom Layouts/Filters.
Opening a file by using the Keep Everything option can be very helpful if you are planning reoccurring projects throughout the year. All you will need to do in the new file is change your project start date. You can also use lessons learned to enter in accurate durations for tasks without having to re-plan the entire project.
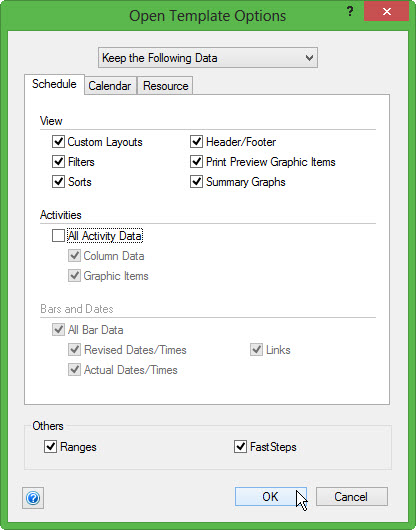
There is an additional option available for opening schedules from templates, which gives us much more flexibility in creating a new file. To use this option, we will go back through the original steps to opening a template. Go to File > New > New Schedule from Template, from the Templates window select the template and then select OK to move to the Open Template Options window. While in this window, use the drop-down menu to select the option Keep the Following Data.
This option will allow users to choose the exact items they wish to transfer from the template and which items they would like to leave behind. When working with this method, we can select features based on the View that they occur in. In the Schedule tab we have the option of selecting items such as Layouts/Filters, Activity Data, and Bar Data.
For our example, let’s de-select All Activity Data, which will also de-select All Bar Data. Once we have made this change, select OK to save your choices and open the template file.
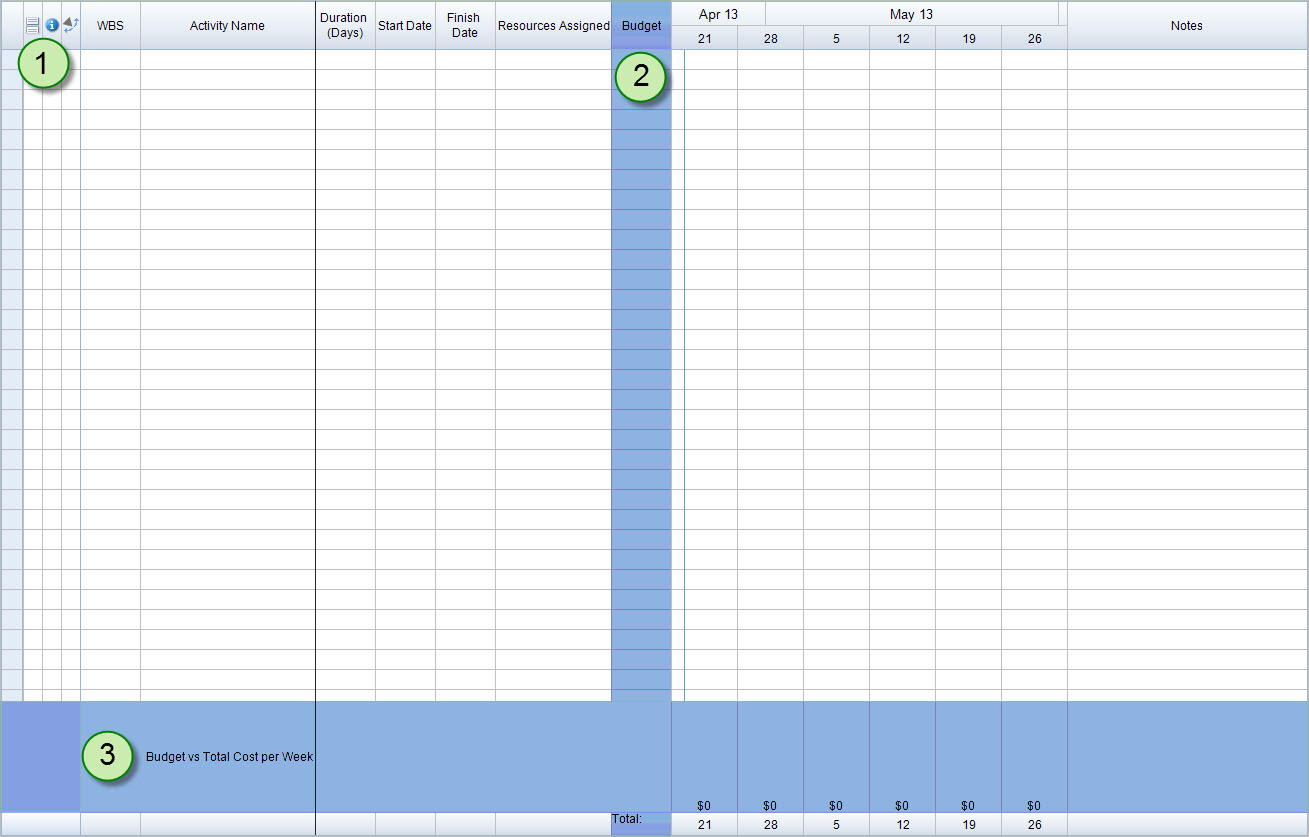
When our file opens, it looks like a plain blank file. However, if we take a closer look we’ll find that all of the key features from our original file have transferred over except the activities. Our customized Layouts (1), Columns (2), Summary Graphs (3), Resources, and even Work Calendars have been brought into this new file.
Now that we have opened a blank file with all of our features we can quickly and easily create a new project without having to spend time on adding the features back in. Have you ever used templates to ease the process of creating new files? What type of data do you add to your template files in order to achieve a universal feel throughout your projects?