
When planning our projects there is often an almost infinite amount of data that we want to track and manage. However as we add more details to our projects it can often be difficult to present all of that information in a clear and concise way. In FastTrack Schedule 10, users have the ability to add any of the data columns in their schedule as labels to the various activity bars in the Timeline Graph. This allows users to easily display extra details without having to display each column when printing or sharing a schedule.
As we can see in the schedule below, data columns can often take up quite a bit of space within a schedule, and the space that they take up will be translated over when we print or even create an image of the schedule. To help clean things up we can hide columns and instead display the text as labels on our bars.

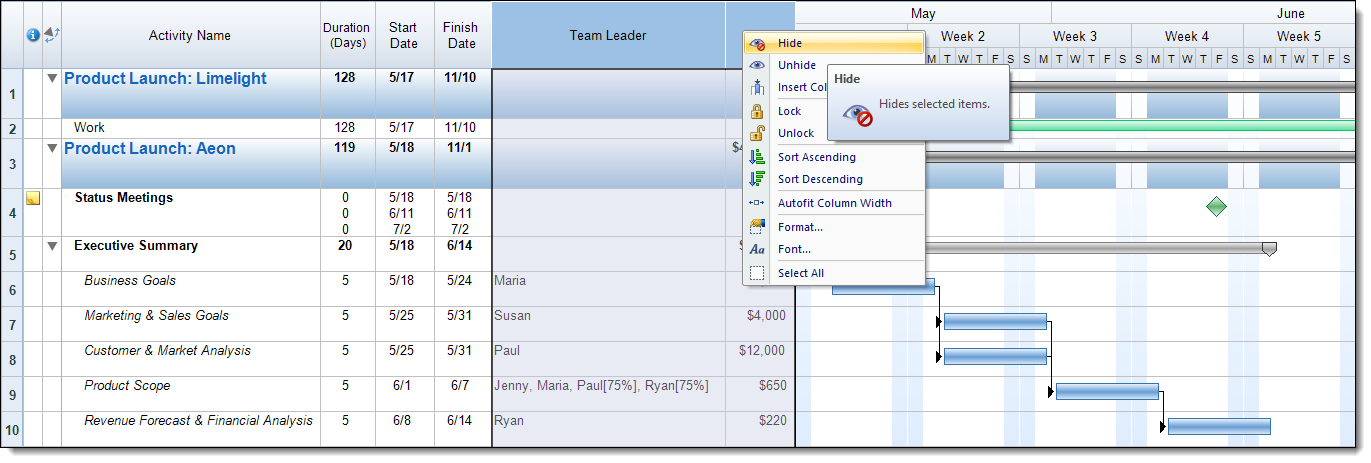
First let’s start by hiding the columns that we do not wish to display in the schedule. Here I will hide the Team Leader and Cost columns. To hide those simply select the Team Leader column header, then hold down the Shift Key on your keyboard and select the Cost column header. Doing this will select both columns. Next Right-Click or Control-Click on either of the columns and select Hide. This will remove the columns from the visible layout but maintain the data in the schedule.
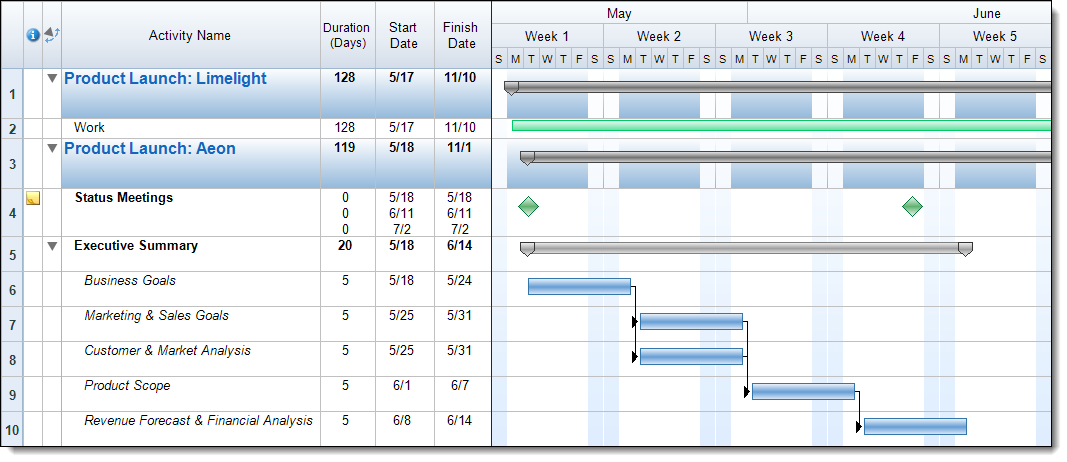
As we can now see we have freed up quite a bit of space in our schedule for when we go to print or share it. However because we hid the columns, that data is not visible in the schedule at all anymore.
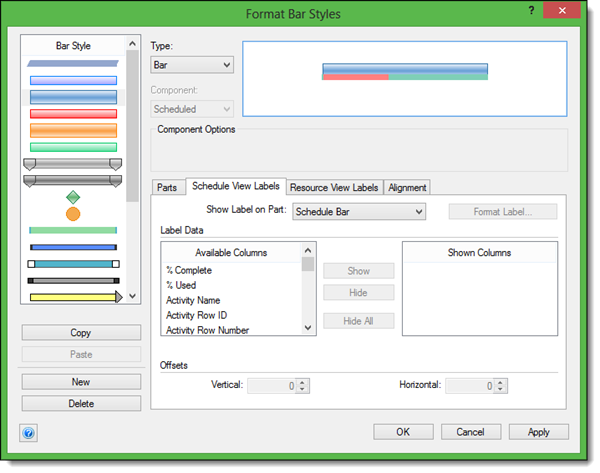
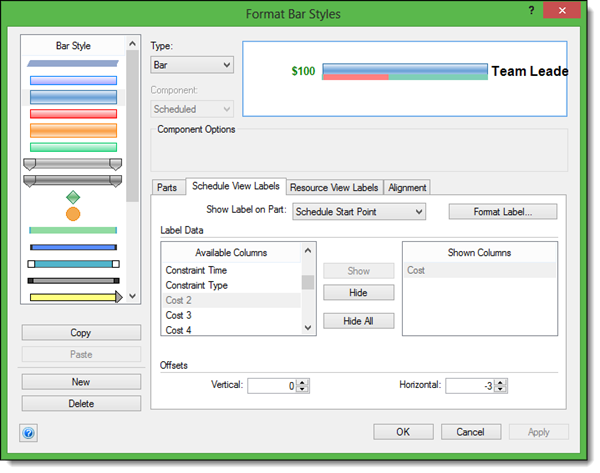
Next we need to add the columns as labels on our activity bars. To begin go to Format > Bar Styles. From the Bar Styles list select the bar you wish to add your labels to and then select the Schedule View Label tab. This will be where we can select which columns to display as labels.
While in the Schedule View Labels section we can select the Show Label on Part to select where the label should appear. First I will select the Schedule End Point to show a label to the right of the bar. Next we can browse through the list of columns and find the Team Leader column, then select Show. This will move the column to the Shown Columns list and also display it in the preview box.
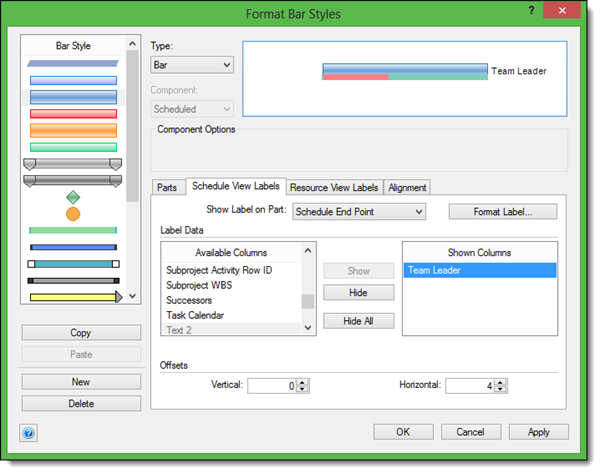
If we want we can then format the label by changing settings such as Font Size, Color, etc.. To do this select the Team Leader column in Shown Columns, then select Format Label. In this example we will increase the font size and make the text bold.

Now that we’ve added our Team Leader label we can do the same for our Cost column. First I will switch the Show Label on Part to the Schedule Start Point, so that the label appears to the left of the bar. Then scroll the Shown Columns list to find Cost and select Show. Once again we can format the label to make it appear differently than the default.
With both labels added and formatted as we wish them to appear we can now select Apply and OK to apply and close the Format Bar Styles dialogue. Now when looking at the schedule we can easily see all of the data that we have entered without having to have additional columns displayed in our schedules.

Using bar labels makes it very easy to display larger amounts of data in our schedule, even where we previously thought it may not be possible. Are there certain columns that you now want to hide and instead displays as labels within your own schedules?
