
Managing the calendar of a project can be pivotal in ensuring the project occurs as close to the schedule as possible. When working with calendars we can define how each day will function and even account for individual exceptions throughout the project, such as holidays or delays. When working with resources on our projects it is often crucial to account for their individual calendars. Resources may have periods of non-work throughout the schedule that vary from the overall calendar or you may want a resource to follow an entirely separate calendar than the rest of the project.
In FastTrack Schedule 10 we can easily define unique exceptions for every resource in our project or assign them to “blanket” calendars. Managing our Resource Work Calendars will ensure that we account for every possibility of non-work throughout the schedule, allowing us to plan our projects as precisely as possible.
To modify a resource’s work calendar we first need to open the Resource Information Form. To access the Information Form while in the Resource View click in the Information Action Column beside the resource’s row number.Once the information form is opened select the Work Calendar tab. This will allow us to view and modify the resource’s work calendar.
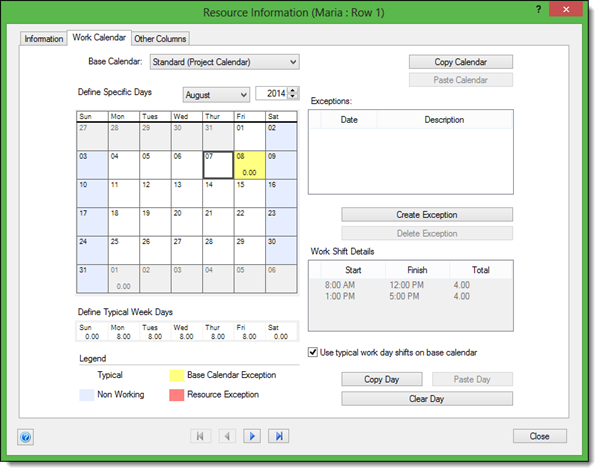
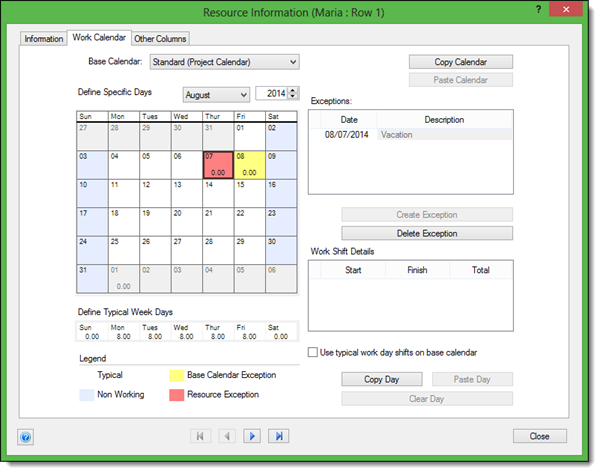
When looking at a resource’s Work Calendar we can see items such as the base calendar that resource will follow and any pre-defined exceptions that may appear in that calendar. We also have the ability to create resource-specific exceptions. To create a resource-specific exception select any day from the calendar and then select the option Create Exception. This will automatically remove all hours from the day, place a red-shading on the day to indicate the exception is only for that resource, and place the date with a default “unnamed” description in the Exceptions box. We can always modify the exception name to provide more details about the non-working period.
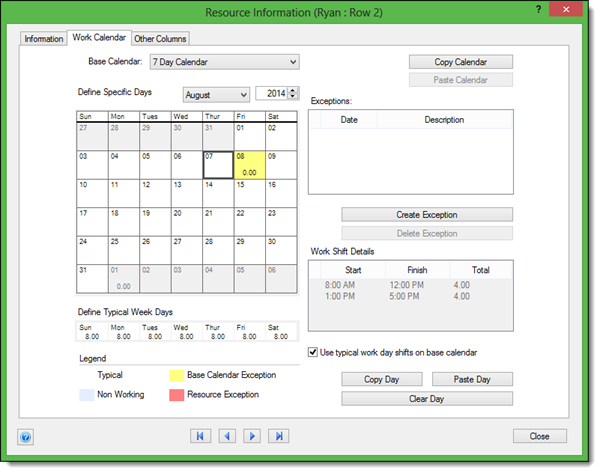
When we are done modifying the Work Calendar for one resource, we can use the navigation arrows at the bottom of the window to easily cycle to the next resource in our schedule. The second option we have when working with resource calendars is to assign the resource to a base calendar that is different from the overall project. For example: maybe there is a resource in your project that will work from a 7 Day calendar, allowing them to work on any day, even days considered non-working for the overall project. To change the Base Calendar for a resource go to the Base Calendar drop-down menu. Here we can view all of the defined calendars. If necessary you can first create a new Work Calendar for the resource to follow. When you then select the new calendar from the drop-down menu the resource’s calendar will automatically update to reflect this. Like before, all exceptions will automatically transfer over. We will then have the ability to once again define individual resource exceptions independent of the “blanket” calendar.
By switching the entire calendar we can easily ensure the resource will follow that exact schedule, and any task the resource is assigned to will automatically account for this difference. Creating work calendars for resources can be a key step in planning and managing your project. Doing this will allow you to easily manage the project without having to worry about any conflicts with the working schedule. Do you currently account for resource calendars in your projects? If not how can doing so help you better manage how your projects occur?
