
In many projects, resource management is extremely important for maximum project efficiency. Management of project resources can easily be done by utilizing tools from both the Schedule and Resource Views. The Resources Assigned column is a great way to initially setup our resource assignments, but when it comes time to create reports for each resource’s work we may be looking for a way to clearly display which resource is assigned to each task without having to actually display the Resources Assigned column.
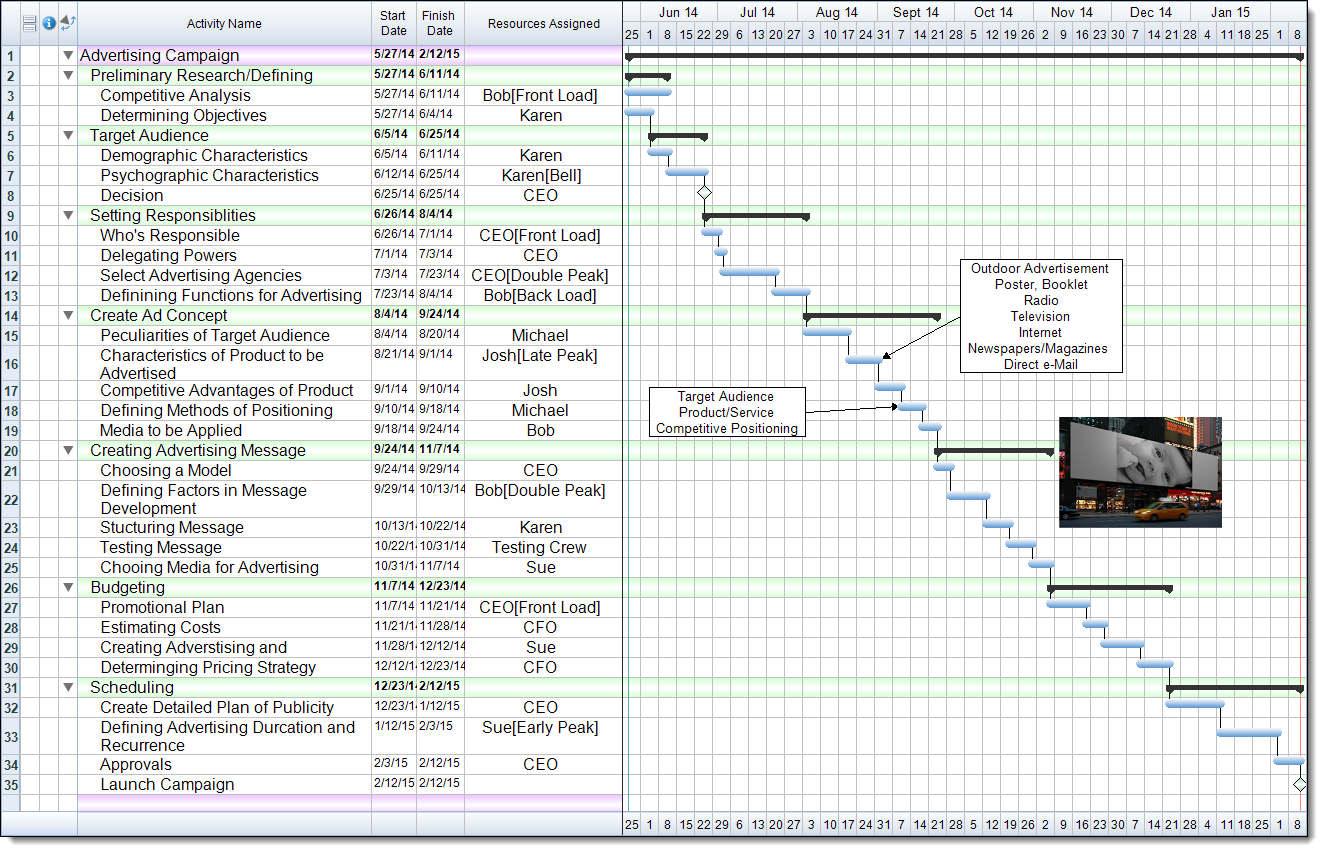
In FastTrack Schedule we can assign specific bar styles to activities according to the resources that are assigned. Assigning these specific bar styles will allow us to minimize the amount of space we use while still creating a fully functional report. Let’s begin by taking a look at a schedule that has resources assigned, which we can be seen by viewing the Resources Assigned column.
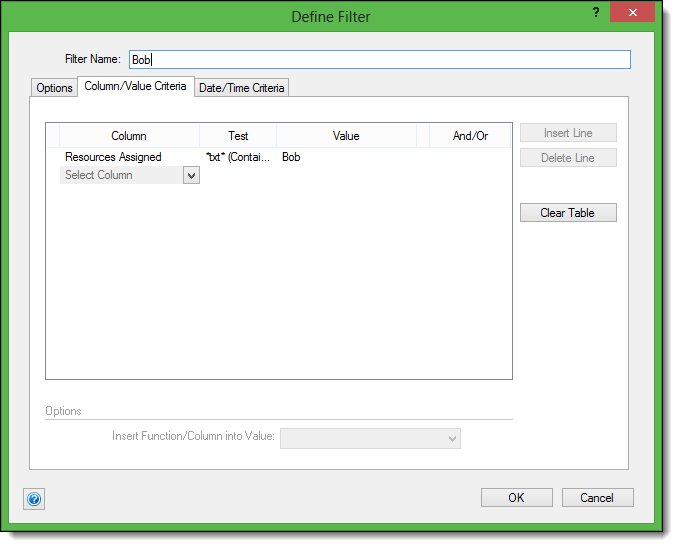
In FastTrack Schedule there is no direct way to set a bar style for each resource; instead, we will accomplish this by selecting specific tasks that resources are assigned to and then changing their existing style. To simplify this we can create Filters for each of the resources in our file, which will allow us to quickly show only tasks that a specific resource is assigned to. In the example below, we have created a Filter for the resource Bob. Using this same setup we can easily duplicate and create new filters for each additional resource in the project.
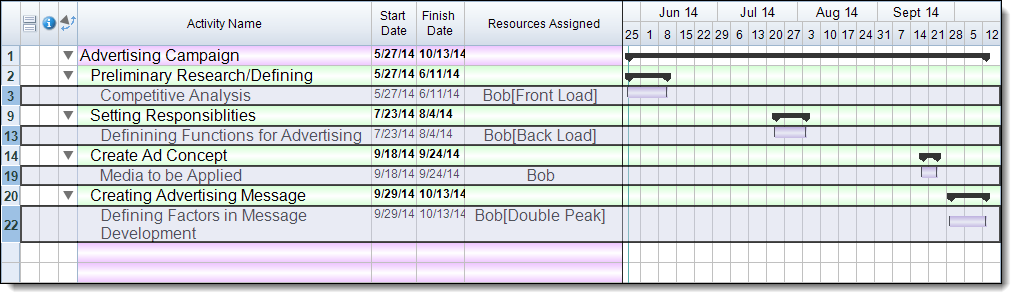
When we then run the Filter for Bob’s tasks our schedule will automatically update to show only tasks that Bob is assigned to. From here we can select the row numbers corresponding to each of the activities that are assigned to him. Then we can select any bar style from our Bar Styles drop-down menu. As soon as we select a new bar style all of the selected tasks will update to match this.
When we then remove the filter we can easily see the difference in bar styles that are assigned to Bob’s tasks compared to all the other activities.

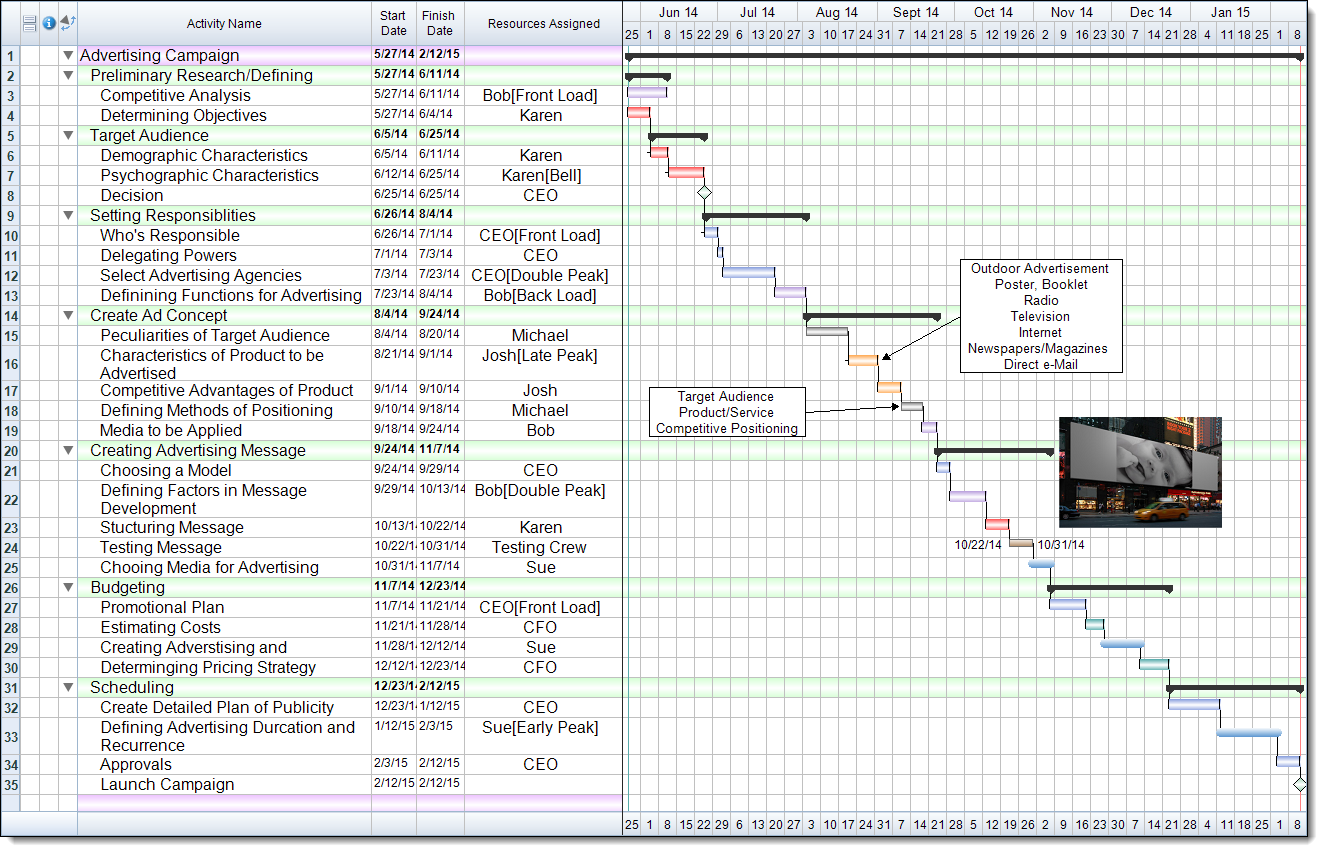
Now that we have changed the bar style for one resource we can continue to do this for the rest of our resources as well. To do this we can follow the process for Bob, and run a filter corresponding to the additional resources. After we have done this we will be able to view our schedule and easily see specific activity bars based on the resources that are assigned to them.
The last things that we can do to really make use of these new bar styles would be to add a corresponding legend to indicate what resource each bar style matches up with and hide the Resources Assigned column. To do this we can go to Insert > Legend. Here you will be able to format the exact appearance and labels you want to see. Once we insert the Legend into the schedule we can shift this to any location within the Timeline Graph. We can then hide the Resources Assigned column by Right-Clicking or Control-Clicking on the column header and selecting hide.
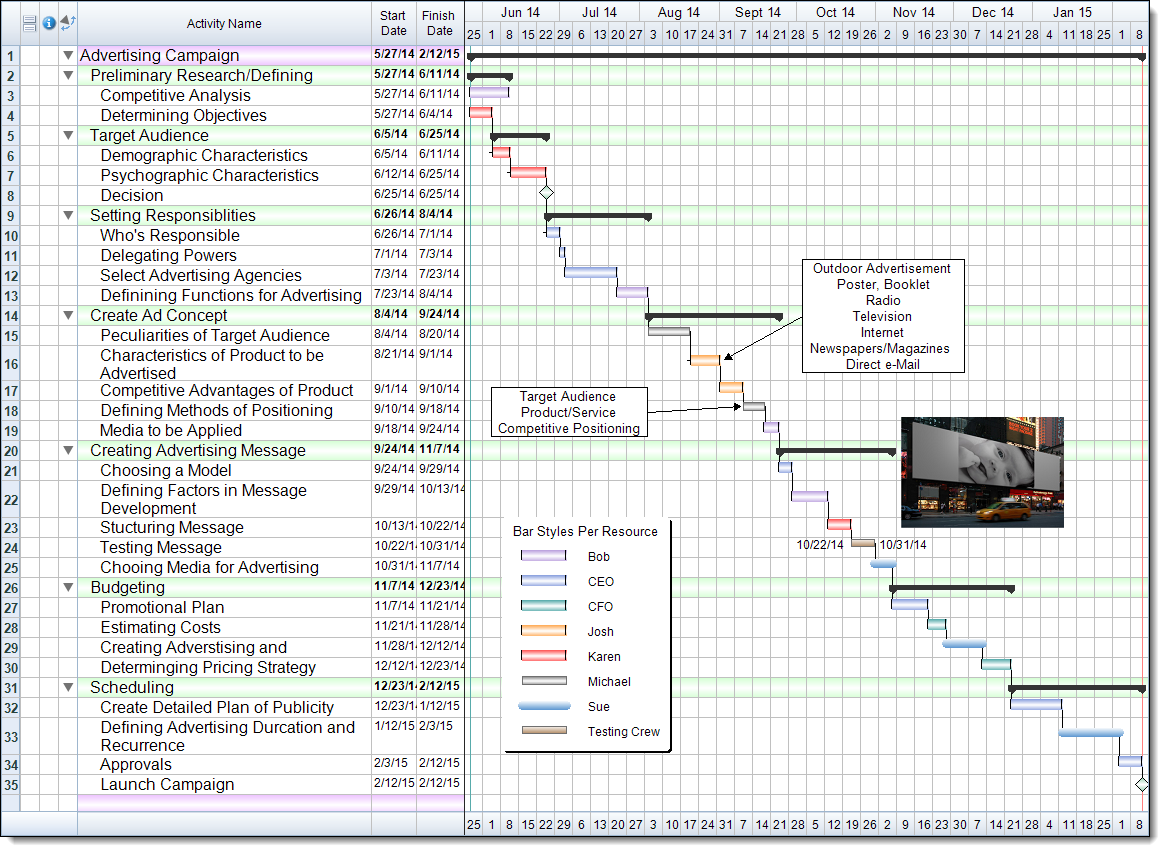
Now we can see which resource is assigned to each task simply by looking at the Timeline Graph and bar style that is used. This allows us to maximize the amount of data that is being displayed while minimizing the amount of space it takes to create the report. Have you assigned Bar Styles per Resource in your file? What other uses can you think of for assigning specific bar styles to different types of tasks?
