
Throughout our blog posts we have taken different looks at how to create reports, share our projects, and even spruce up our print preview. There are, however, additional steps we can take to give our schedule a personalized look. The feature that we will work with today is known as Outline Styles. In FastTrack Schedule 10, Outline Styles will allow us to customize the appearance of text and even the background of our schedule according to the specific outline level that different tasks fall on.
Using Outline Styles allows us to place emphasis on key aspects of our projects, such as the project title or main phases that occur. Depending on how we wish to format our schedules, we can create specific outline styles in individual columns and within every row of the project.
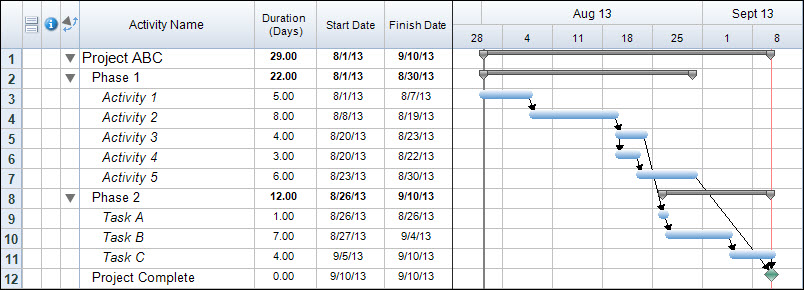
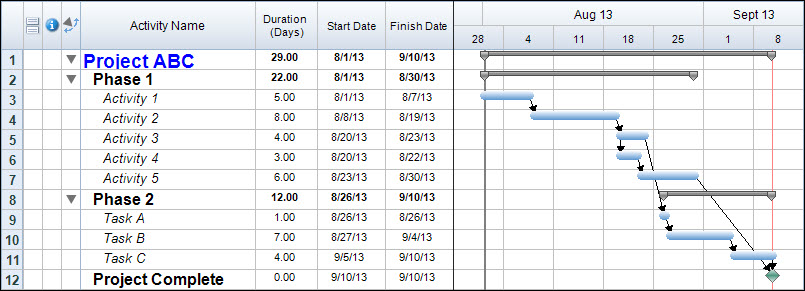
First we’ll take a look at setting outline styles in our columns. This will allow us to set up custom font styles, including font type, size, and color according to the outline level of tasks. If you’ve built outline levels into your own projects in the past you may have noticed that the Activity Name column applies different font styles to the text. In the image below we can see what these predefined outline styles look like when we have 3 outline levels in a project. You’ll notice that as we go into lower outline levels the font size decreases, which may help to indicate that our “Project” and “Phase” levels contain the most important information.
Even though there are predefined outline styles set we can still customize them to match the styling we wish to see within our project. To begin, double click on the Activity Name column header. While in the Format Column dialogue switch to the Font tab. While in the Font tab you will notice that Use Outline Styles is pre-selected, so we can select the Define Outline Styles button in order to modify the existing styles. When we do this, a new Column Outline Level Styles dialogue will open.
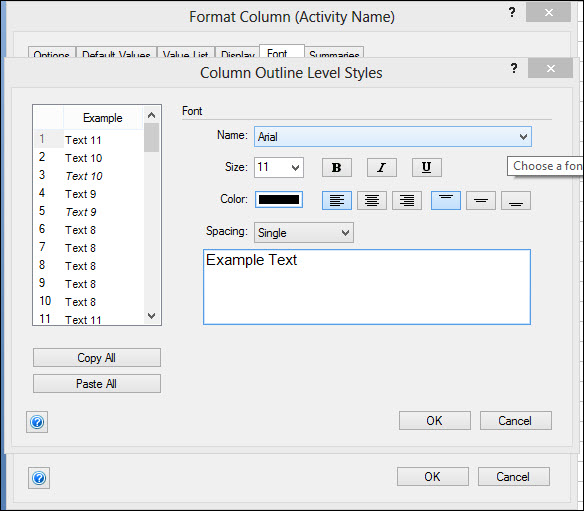
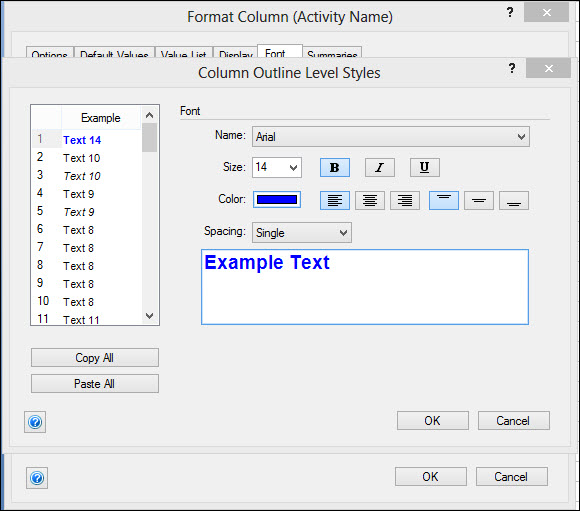
While in the Column Outline Level Styles dialogue the first area we can work with is the Example window to the left. This will display a number which indicates the Outline Level and an example, which will show the font style, size, and if there are additional attributes such as bold or italics. To modify an outline level select the level number from the example window. You can then use the Font options to the right. For our first outline, I am going to increase the size to 14, change the color to blue, and apply the bold font attribute. As we make changes the box beneath the font options will update to show us a preview of what the text will look like.
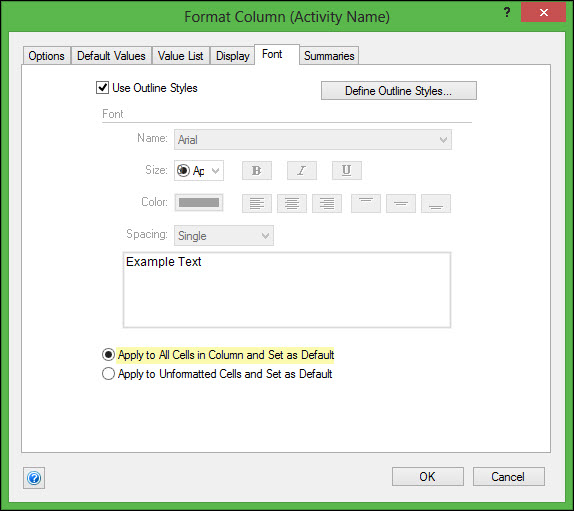
After we have set our first outline level, we can select each additional outline level that we wish to modify and change the fonts here as well. When we have defined all of the outline levels that we will use press OK to save the settings and close the Column Outline Level Styles dialogue. This will bring us back to the Format Column dialogue. At the bottom of the dialogue there are two options to select from. Here we will select the option Apply to All Cells in Column and Set as Default. This will apply the Outline Styles to the text that is already in our project, and also set it as the default for any new tasks that we enter.
When we then select OK the changes will be saved and applied to our schedule. In the image below we can see that all tasks in outline level 1 have changed to be size 14, blue, and bold. Outline 2 is now size 12, black, and bold, while outline level 3 has stayed as it was originally set. These different font styles now allow us to easily see where the focus of our attention should be within the project.
Here we have only set column outlines on our Activity Name column however, we can set these outline on any column that we wish to within the project. It is also possible to use different outline styles for each column, which can once again allow us to draw attention to important data in certain columns.
Now that we’ve set our Column Outline Level Styles we can move on to creating and setting Row Outline Level Styles. This will be where we can set up specific shading and patterns in the background of our rows.
To begin, double click on any row number within the project. This will open the Format Row dialogue. Within rows, we can actually set individual styles per row, however today we will focus on setting styles based on outline levels. We will place check in the box labeled Use Outline Styles and then select the Define Outline Styles button. This will open the Outline Level Styles dialogue where we can set exactly how we wish our rows to appear.
You will notice that the Outline Level Styles dialogue for rows is very similar to that of columns. To the left we once again have an example box, but instead of show font style here we see a few different colors displayed.
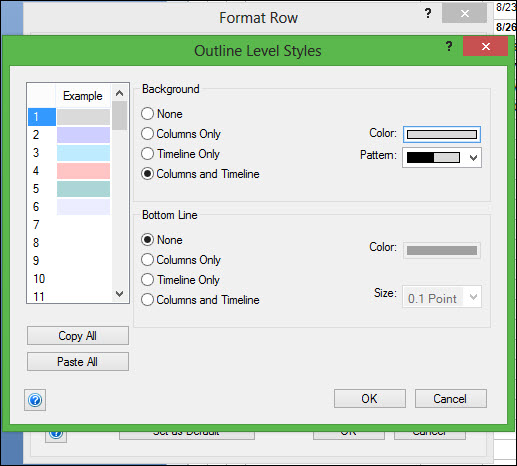
You’ll notice that much like with the columns the first six outline levels already have predefined styles. If these styles don’t match with how we wish our schedule to appear we can once again select the outline level and then use the Background and Bottom Line sections the right. The Background will allow us to set where we wish a shading to appear as well as the color and pattern used in the shading. The Bottom Line allows us to apply a colored line between outline levels, and we can once again choose where we wish this to appear. With both options we can choose to show the styling in the Columns Only, Timeline Only, or in both Columns and Timeline.
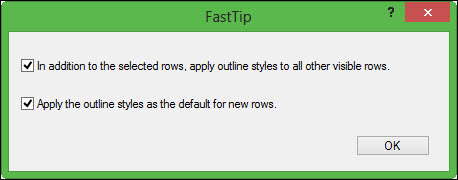
Since outline styles are already defined we will press OK to save them and close the Outline Level Styles dialogue. We can then once again select OK to save and close the Format Row dialogue. When we do this a new FastTip pop-up will appear with two options. The first option says that In addition to the selected rows, apply outline styles to all other visible rows. We will select this box because when we opened the Format Row dialogue we did this by selecting only a single row, however we wish to apply the outline styles to all of the rows in our project. We can also select to Apply the outline styles as the default for new rows. This means that when we enter new data into our project the correct outline background style will automatically be applied.
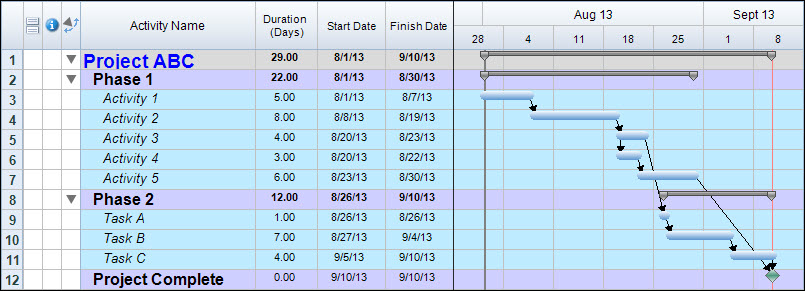
When we select OK, the Row Outline Styles will then automatically be applied to our existing tasks. Now we can view our project and determine if we need to change colors or patterns in order to better draw attention to key areas.
FastTrack Schedule 10 allows users to customize up to 64 different outline level styles for both columns and rows, giving a great amount of customization to projects of any size. Have you utilized outline styles in your projects before? What are some ways that you can use them to give your project a truly customized feel?
