
Just because we are out of the office doesn’t mean that we shouldn’t have access to our full project plan. When using FastTrack Go, we can easily view all of the data that’s built into our schedule, even data stored in customized columns. Much like in FastTrack Schedule 10, FastTrack Go allows us to utilize existing and customization layouts based on the type of project data that we would like to see.
First, let’s take a look at some of the data that we see in our schedule while using FastTrack Schedule 10.
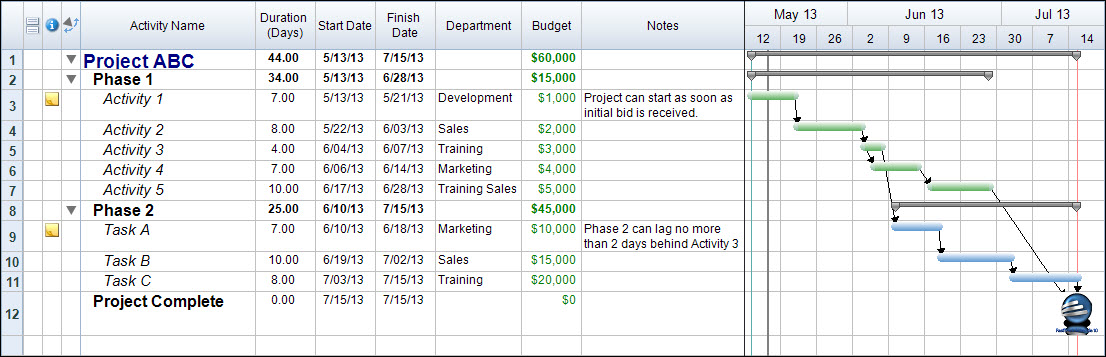
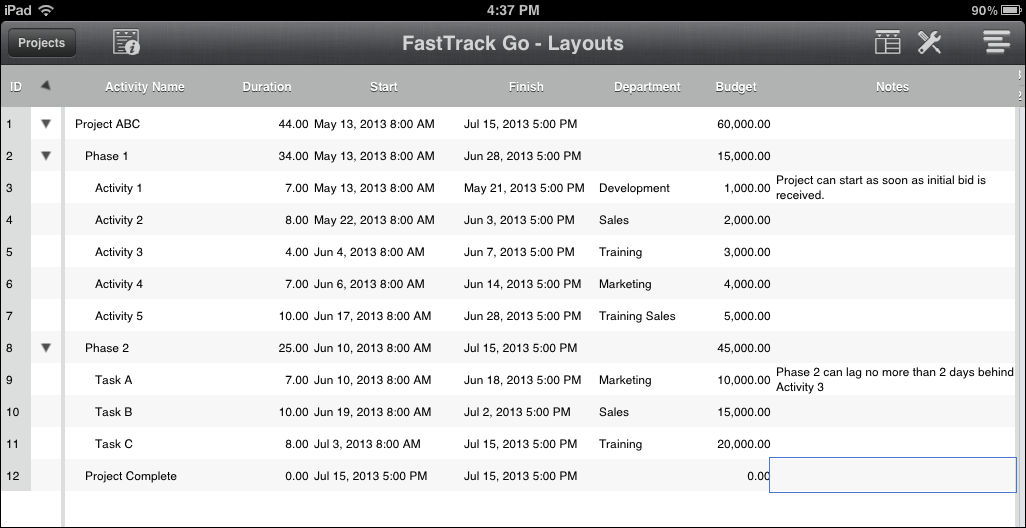
Here we see some “standard” data such as Activity Name, Start Date, and Finish Date but we also see some additional columns for items such as Department, Budget, and project Notes.
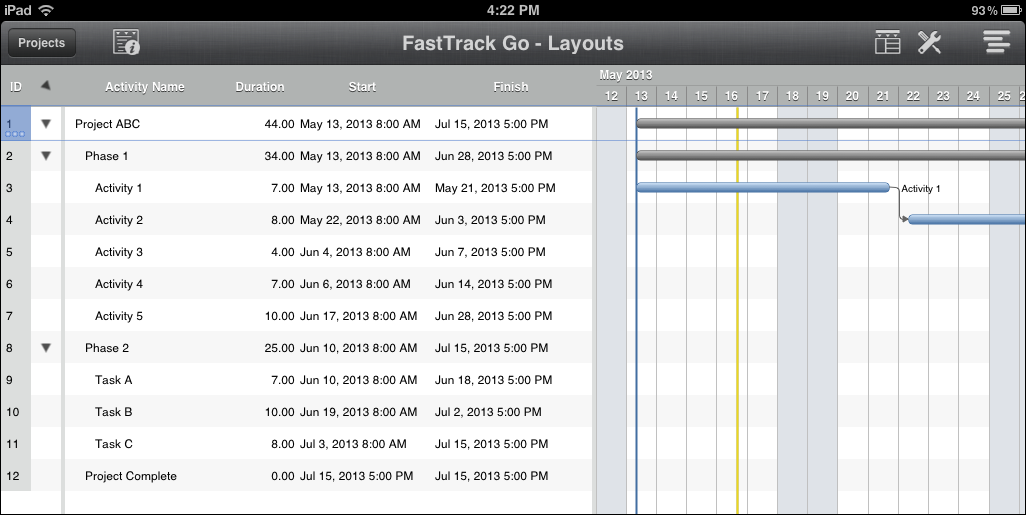
Now, we can load our file into FastTrack Go so that we can set it up to display the same information. When we open our file, much like in FastTrack Schedule 10 we first see our Main Layout which displays Activity Name, Duration, Start Date, and Finish Date.
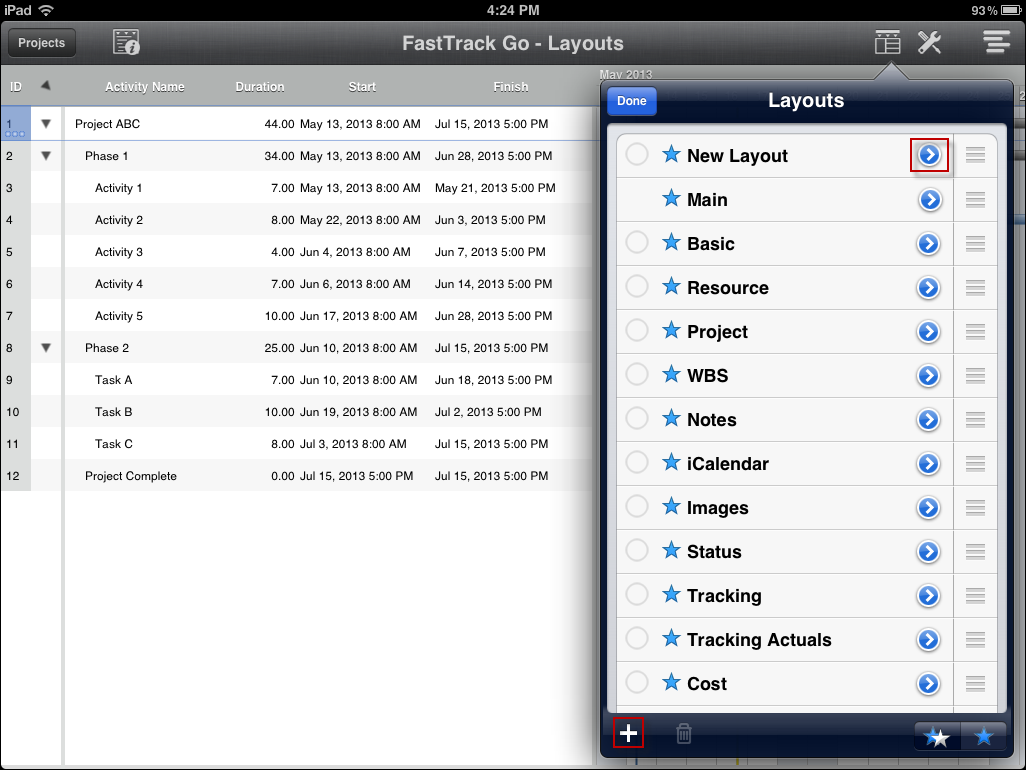
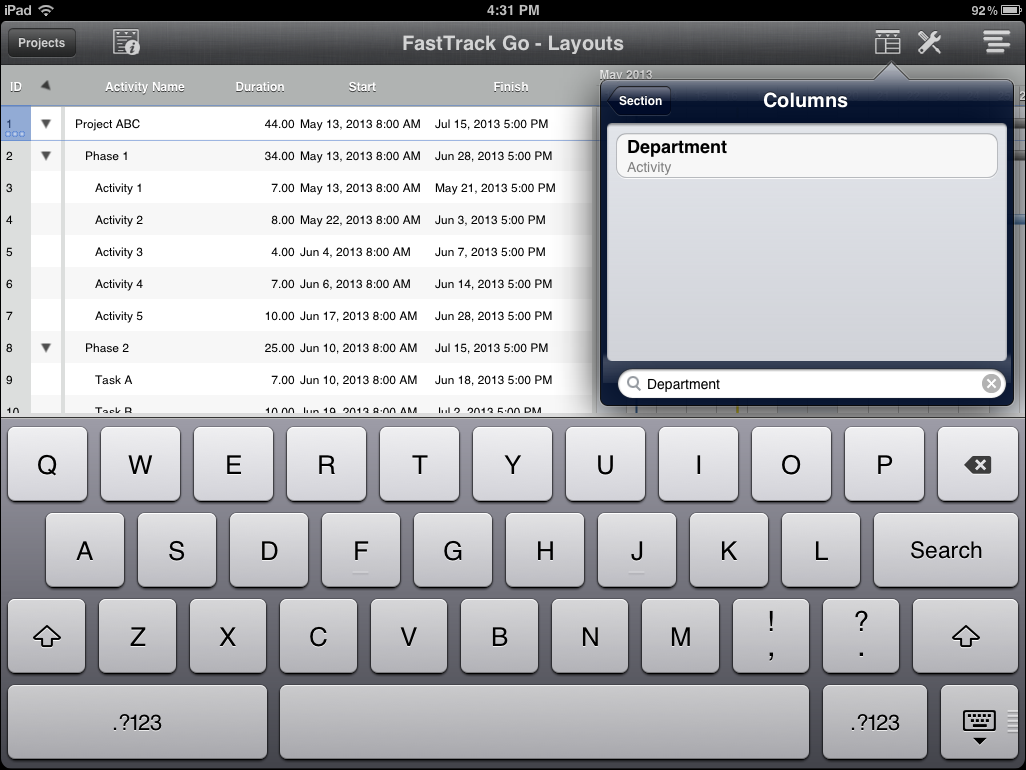
To then see our additional data we need to create a customized Layout. To do this, first select the Layouts and Filters button. Then, select Edit followed by the + sign in order to create a new layout. This new layout will be added to the list and you can then select the chevron arrow to open the define pop over.
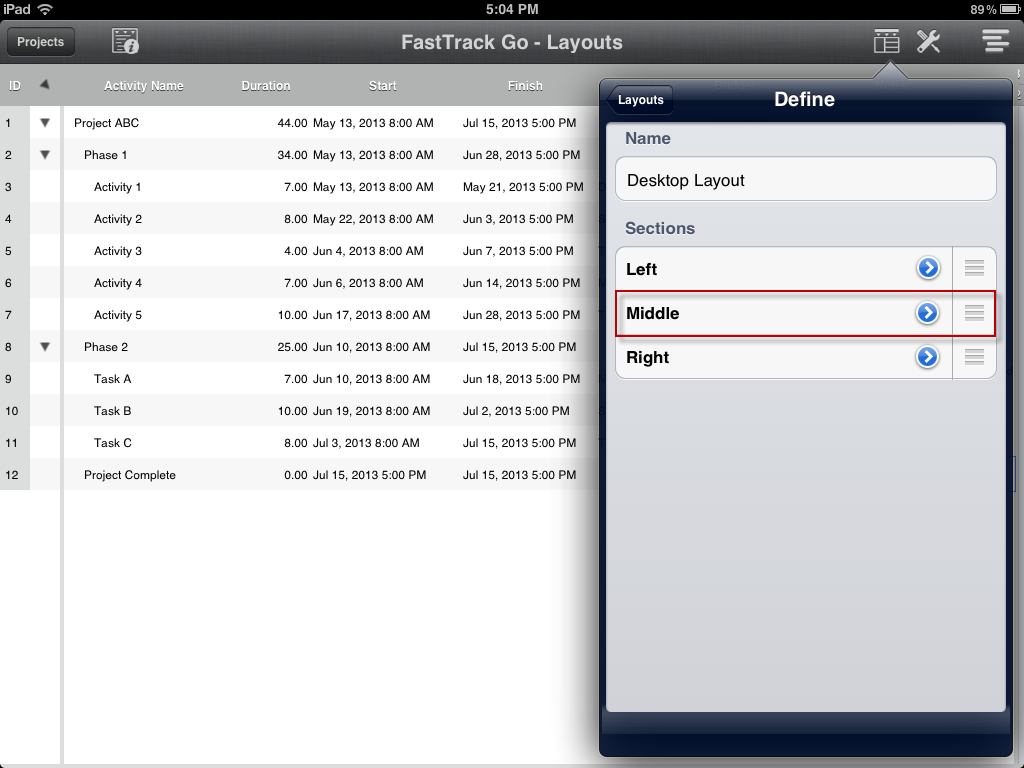
Much like the desktop, our first step in creating the layout is to enter in a customized name. We’ll call this layout the Desktop Layout. Next, we can select which Section of the screen we would like to place our columns. The Left section typically shows the row number and expand collapse button, the Middle section typically shows our columns, and the Right section shows our Timeline Graph. We’ll select the Middle section to keep everything in the original format.
To add columns to the section select the + sign; you can then scroll or type to find the column you wish to add. We’ll add in our original columns: Duration, Start Date and Finish Date. Then, we can search through to find our customized columns: Department, Budget, and Notes.
After you have added all of the columns you wish to view, you can select Section to go to the previous window. Now, we can see a full list of the columns that will be displayed.

If the list looks correct we can once again select Define to close the sections pop over and then Layouts to go to our full layouts list. Finally, select Done to close the edit mode of our layouts.
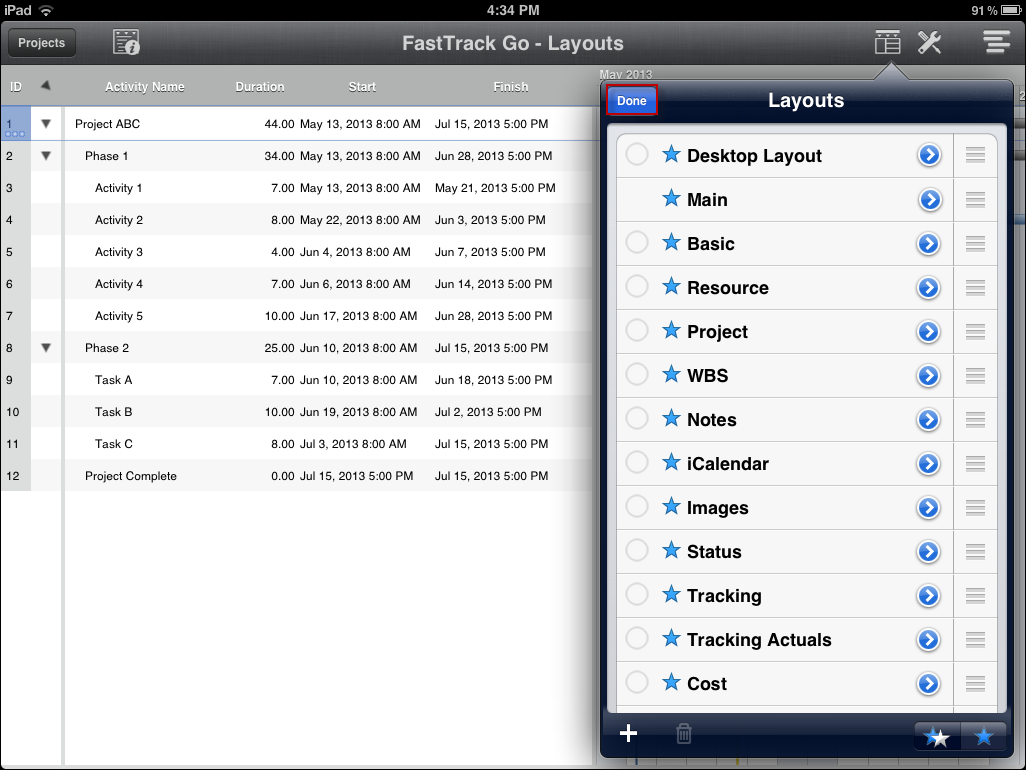
Now, to apply our layout so that we can see our existing project data we can select the Desktop Layout from the list. This will automatically switch us to our newly created layout so we can once again see the data from FastTrack Schedule 10.
Using layouts can be a great way to view the different types of data stored within your projects. You can quickly and easily create different layouts based on the data that you need to see and who you need to share that data with. Can you think of some useful layouts that you would use while in the field?
