
In FastTrack schedule 10, you have the ability to work with nearly 500 customizable columns. Managing the behavior of the columns and when each is visible in a project is key. Using Layouts, you can easily cycle through different sets of columns based on the type of data you need to display in your project.
FastTrack Schedule 10 comes with many pre-define layouts, which cover the essential data of a project. You also have the ability to custom define layouts using any of the nearly 500 columns that you want. In today’s post, we will take a look at creating a layout capable of displaying key data for a company meeting.
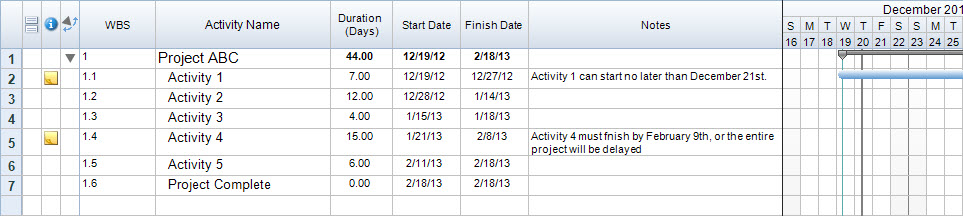
First, let’s take a look at the data we see when working in our default Main Layout.
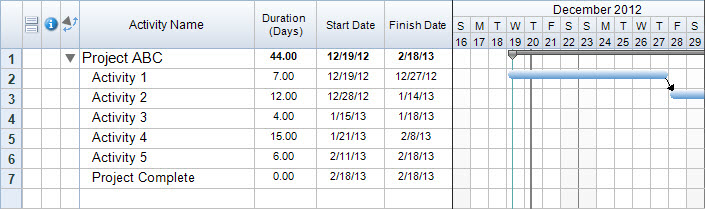
As we can see, the main layout is pretty straightforward, yet is able to convey some of our most important project information, the scheduled dates and durations for our tasks. However, for the purpose of a meeting, this layout may not include other key data that you need to present, such as notes on the tasks. We can easily create a new layout, using the Main Layout as a base, which will be able to show us this additional data.
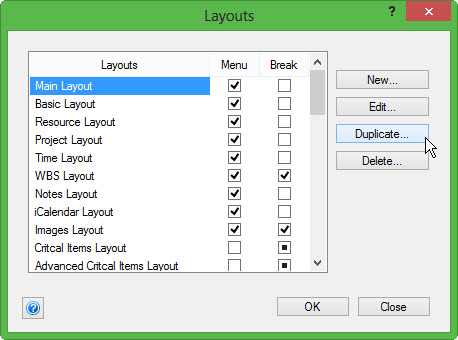
To create a new Layout, go to the Layouts tool and select Define. Once in the Layouts Menu, highlight Main Layout and then select Duplicate. This will create an exact copy of the main layout that we can modify without affecting the original layout.
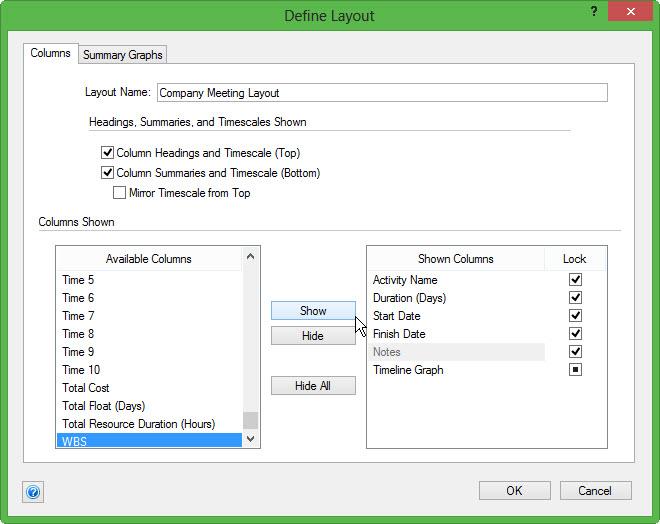
Once we select duplicate, the Define Layout Dialog will open. The first step in creating a new layout is to enter a customized name, typically based on what the data will display or what the layout will be used for. In this case, we will call the layout Company Meeting Layout.

Now that we’ve entered a customized name, we can choose to add or remove columns to our new layout. To add columns, follow these steps:
1. From the Available Columns list, scroll down until you locate the column Notes.
2. Select Show to move the Notes column to the Shown Columns list.
3. Repeat this step for the column WBS or Work Breakdown Structure.
4. Once we’ve entered our columns, we can drag to reorder them.
a. The order of the columns, from top to bottom in the Shown Columns list is how the columns will appear from left to right when we view the layout.
5. We can select the WBS column and drag it to the top of our Shown Columns list, making it the first column that will be displayed.
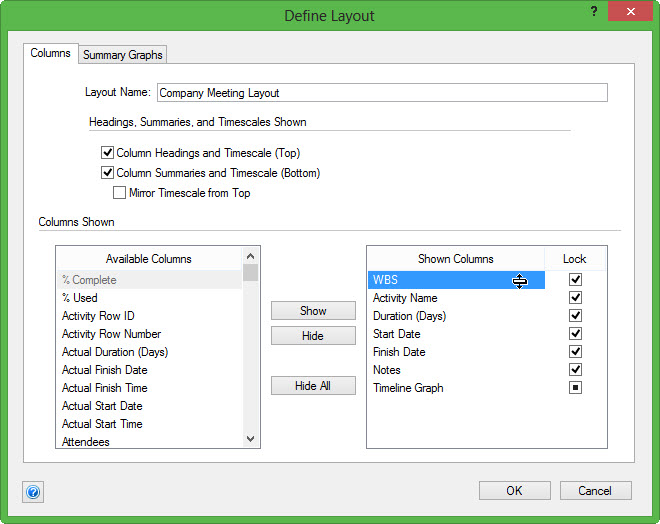
6. You can then select “OK” to save your layout and “Close” to close the Layout Dialog.
To apply our Company Meeting Layout, so that we can view our key presentation data, go to the Layouts tool and select Company Meeting Layout. Our Layout will switch and we can now see the additional “WBS” and “Notes” columns being displayed.
Using layouts, we can easily switch between different displays of columns in our schedule. Oftentimes, we do this based on the type of data we need to share, and who we need to share the data with.
Have you utilized Layouts in your projects to create easy-to-use reports? If so, what are some of your favorite layouts that you’ve created?
