In a past “FastTrack Schedule Tip” post we looked at how we can easily define Custom Bars and Milestones for our projects. In that post we also went over how to assign items such as a color, pattern, or border to the different bars in your project. Not only can we change the physical appearance of the bars but we can also apply different informational labels to each bar; this information will thus be displayed directly within the Timeline Graph.
With FastTrack Schedule 10 we can add labels to our bars that correspond to any of the nearly 500 customizable columns in the program. On top of that, we can add up to 100 labels to every bar based on the amount of information that we’d like to see displayed.
To begin let’s take a look at a schedule that has already been put together. Here we can see we have a few simple tasks listed out and that our Timeline Graph is currently displayed in Weeks.
One reason that we may choose to use labels on our bars is that it can help reduce the amount of space that our project takes up when printing. Since we can show text directly on or beside a bar we can then hide columns so that the information is not repeated in the same location.
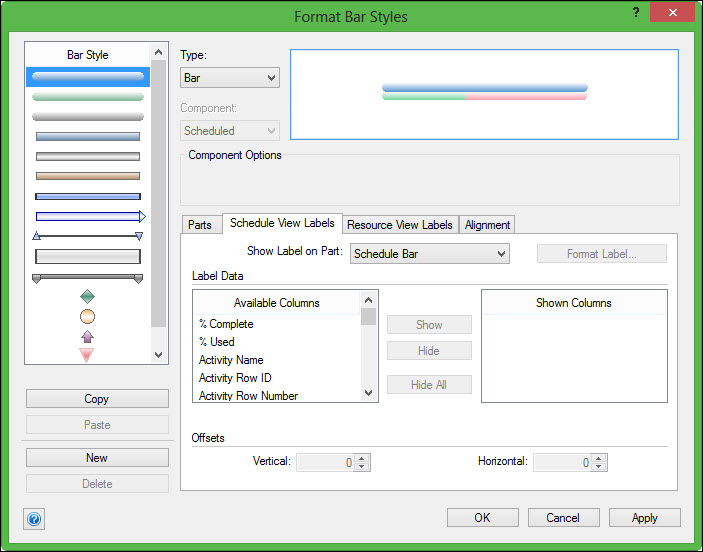
To place a label on a bar go to Format > Bar Style. This will open the Format Bar Styles dialogue. After opening the dialogue select the bar you wish to add a label to from the Bar Style menu. You can then switch to the tab labeled Schedule View Labels.

Within the Schedule View Labels tab we can see a list of all of the Available Columns that we can assign as a label to this bar style. To assign the label first select the portion of the bar where you wish the label to appear using the Show Label on Part drop-down menu. After you have selected the location, scroll through the list of Available Columns until you locate the one you would like to add. You can then select Show which will move the column to the Shown Columns list. You’ll also notice that a preview of what the label looks like will be displayed on the activity bar in the top window.

If you are satisfied with how the label appears, then select Apply and OK to save and close the Format Bar Styles dialogue. As soon as we do this we can now see the label; in this case the information from our Resources Assigned column is displayed on every bar of that type within our project.
Now when looking at our project we can easily see which resources are assigned to every task, without having to display the Resources Assigned column.
With almost endless possibilities for labels on bars, what are some ways that you may be able to utilize this feature to display key data? If you currently use bar labels what are some labels that you use more frequently than others?


