Many projects require us to maintain large lists of information ranging from the priority level of a task to the specific department assigned to each task. Finding a simple, yet efficient way to handle these lists can be an extremely time-consuming task. When manually entering values for these lists, we always have to be aware of any inconsistencies such as misspellings, which may cause an issue when using the list at a later time.
In FastTrack Schedule, we can quickly customize column specific value lists that allow us to efficiently manage our lists of information within a project. These value lists allow us to add new values at any time, select multiple values per row, and even use control features which limit the ability to modify the lists.
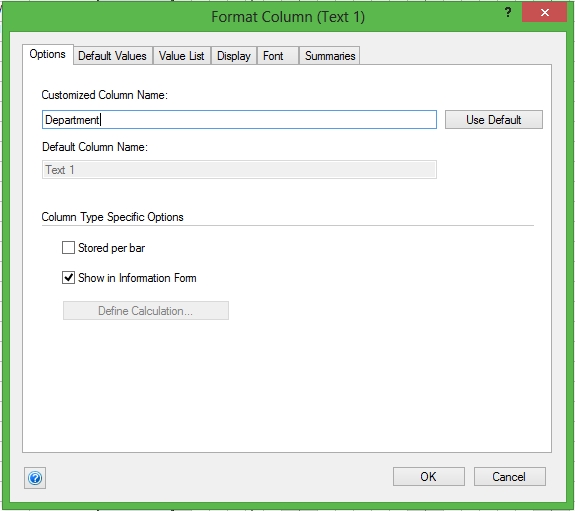
To start off, we first need to input and define a customized column for our data. Here, we will add in a simple text column (Text 1) which we can format to display the different departments working on our project. You can do this by going to Insert > Column > Text 1 > OK. With the column inserted into the file, we can now format it based on the type of data we wish to display. Double-click on the Column Header (Text 1) to open the Format Column Dialog.
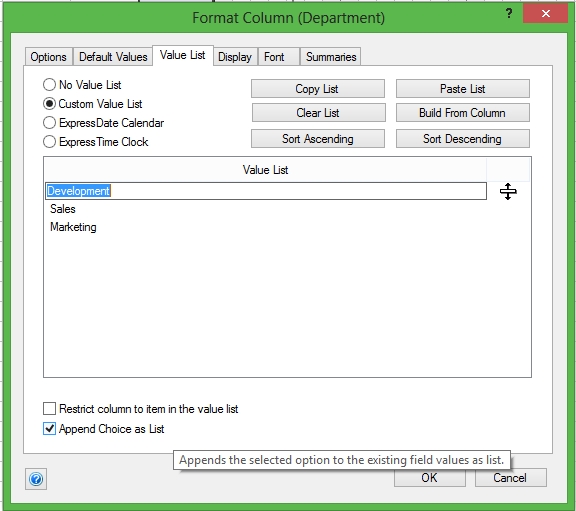
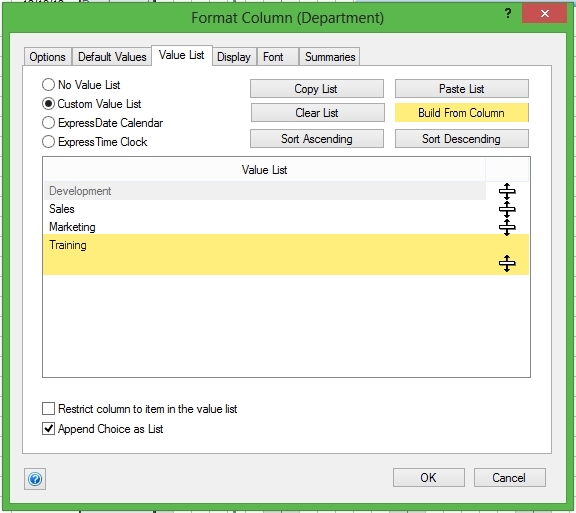
Now fill in a Customized Column Name; in this example, we will use “Department” since the column will show the different departments in the project. Next, select the tab labeled Value List to format the department list. Select Custom Value List to enable value lists for the text column.
Now, we can begin to input the name of the departments that our project has. Tip: After inputting a value, press the down arrow key to move to the next line in the list.
At the bottom of the dialogue window, check the box for Append Choice as List, to allow us to use multiple values from the list within a single row. Once we have done this, click OK to save the list and begin using it to manage your information.
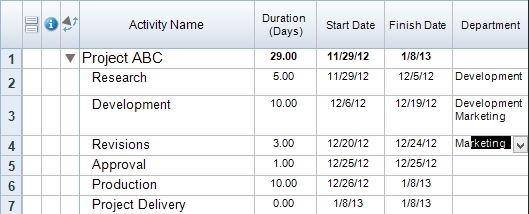
To use the list, select a cell in the Department Column in the corresponding row for an activity. An arrow will appear, clicking it will open a drop-down list of the options you provided for the column’s Value List. Choose the desired department from your list. To add multiple values to an activity; select your first value, then place the cursor at the end of this value and select your second value. You also have the ability to use Auto-fill, where you can type the first few letters of a value and have it automatically populate from the column’s Value List.

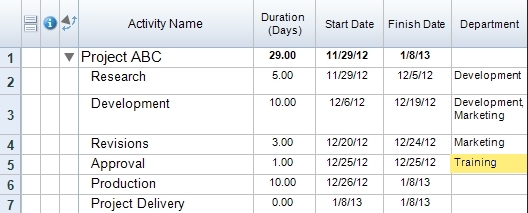
You also have the ability to manually enter any value for an activity as you would with any other column. When you do this, however, the value is not automatically added to the list, so we must do an additional step of formatting to account for this. Once again, double-click on the column header to open the Format Column Dialog. When this is opened, switch to the Value List tab. While in this tab, we can select the Build from Column option, which will automatically pull in any new values from the column that do not already exist in the value list. This helps to ensure that the list will directly match all values that currently appear in the column. If you wish to limit the ability to add new values outside of the Value List tab, select the option labeled Restrict Column to item in the value list.
Have you ever run across a project where you created long lists of information which became hard to manage? How would using a value list have improved the way you worked with your schedule? If you have used value lists before, what would you say was their biggest benefit within your project?
