
Many times, our customers are tackling several projects at one time. Sometimes these projects are related and other times they may be completely separate. When running multiple projects at once, it may become challenging to manage and track data across multiple files. With FastTrack Schedule 10, you have the ability to combine these projects, whether they are related or not.
FastTrack Schedule’s Consolidation feature enables us to combine multiple projects into one large “Master File” in order to create a simple management schedule. When we combine these schedules together, we can make comparisons on key data such as resource allocations, costs of each project, and the dates when tasks must occur.
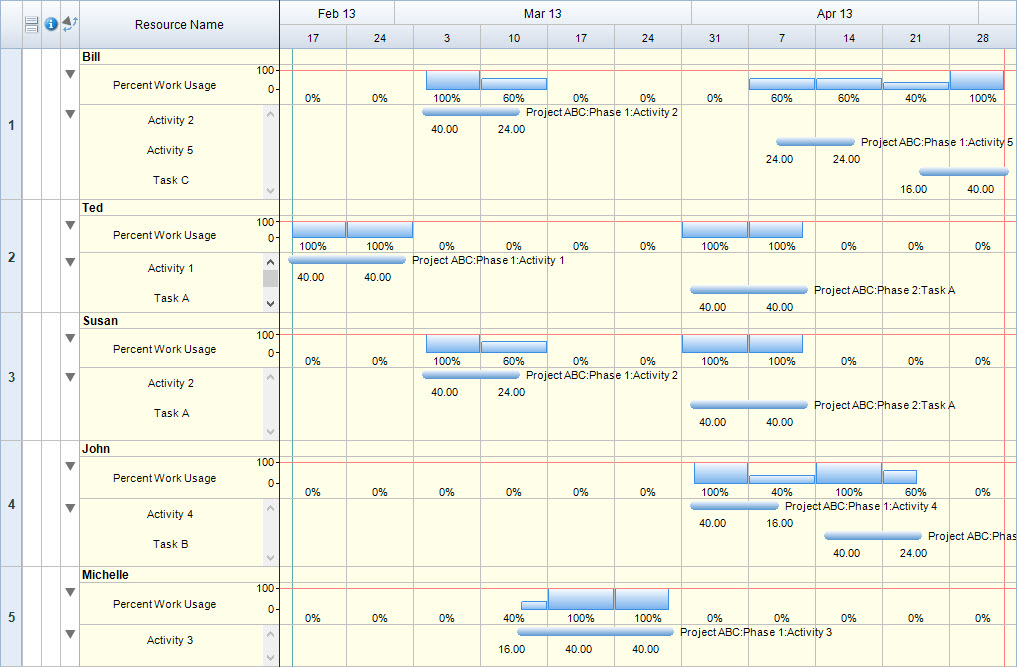
In the example that we’ll use today, we have two schedules “Project ABC” and “Project DEF.” Each of these schedules uses a common set of resources: Bill, Ted, Susan, John, and Michelle. While these projects use the same resources and occur over generally the same time, they are not related. If we focus in on the Resource Allocations of each schedule we can see that there may be areas where a resource is assigned to multiple tasks on a single day. However, when the files are separate it may be harder to identify these areas.
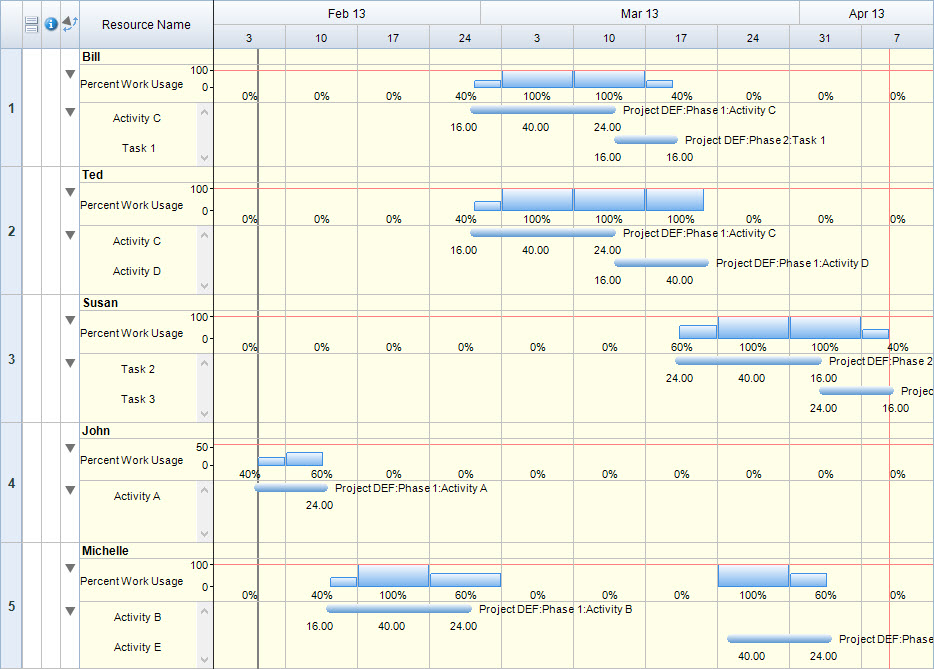
Here we can see the assignments for each project when viewed separately.
Project ABC
Project DEF
To better manage these files, we can combine them into a new Consolidated file. To create a consolidated file, follow these steps.
1. Open a New, blank file.
2. Go to File > Consolidate > Define
3. Select Add to select your first file.
4. Repeat step 3 for each additional file.
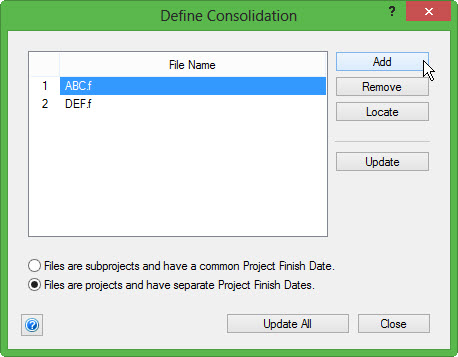
5. Select Files are projects and have separate Project Finish Dates (We do this since our projects are not directly related to one another).
6. Select Update All to combine the files into our new “Master File.”
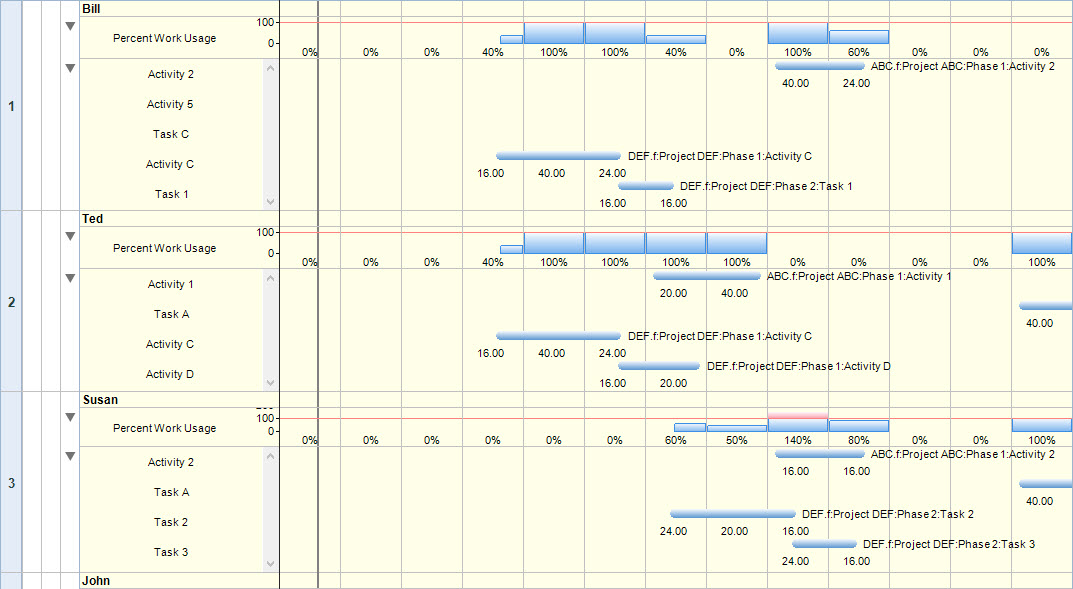
Once our files are combined, we can now switch to the Resource View to check our resource allocations across both projects at once.
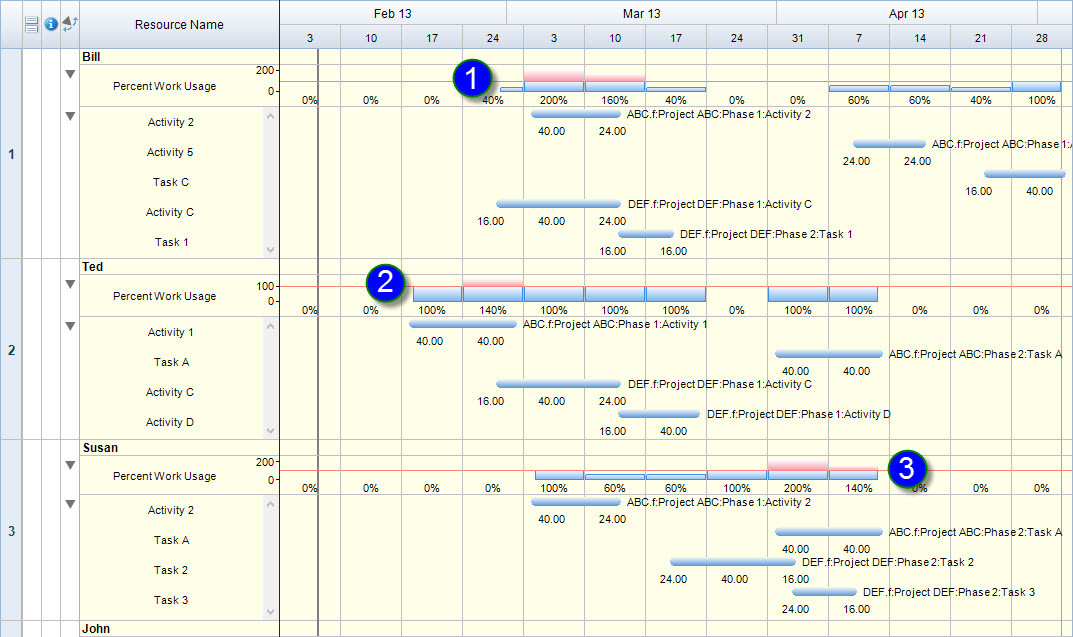
Here, we can see anywhere there may be over allocations due to resources working on multiple tasks at one time. Currently, we see over allocations for 3 resources; Bill (1), Ted (2), and Susan (3).
Once we locate where these over allocations are, and what tasks may be causing them, we have several options. We can change the resource that is assigned to a task in order to remove an over allocation. Another option is to change the date that the project or individual task is starting on. In order to do this, we’ll make the change in the original version of the file.
For example, after viewing our schedule and the current over allocations, it has been determined that we can change the project start date of Project ABC to a later date to help eliminate over allocations.
1. Go to your “Project ABC” file.
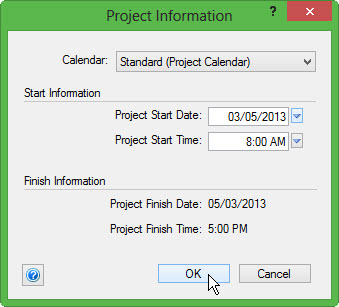
2. Go to Project > Project Information
3. From the “Project Start Date” use the Express Date Calendar to select the new date on which your project will start.
4. Select OK to save the Start Date and apply it to your schedule.
Next, we must save our “Project ABC” file. To make this change appear in our consolidated file, go to File > Consolidate > Get Updates. This will pull in any changes that have been made and saved in our individual files. Once our updates are made, we can once again take a look at our Resource View to check for any over allocations.
We can see that by making a simple change to the start date of one project, we’ve been able to remove Bill and Ted’s over allocations. There are many reasons to create consolidated versions of your schedules – one of the most beneficial is to manage resource allocations across several projects.
If you’ve managed several projects at once, how would using Consolidation have helped you to plan a more efficient schedule?
