
In most of the projects we create, we often find ourselves needing to create reports for different aspects of the project. Sometimes we create reports for upcoming tasks, other times we create reports of schedules for a specific resource. If you worked with reporting in any capacity, you know that it can take quite a bit of time to go through the process of running one report after another. In FastTrack Schedule 10 we can utilize FastSteps which allow you to combine multiple actions, such as applying Layouts and Filters in one simple button push.
FastSteps allow us to automate processes, which would otherwise be quite time consuming, into a single step. FastSteps will even allow us to print multiple reports at once within a matter of seconds.
The first step in working with FastSteps is actually to create all of the specific Layouts, Filters, and even Print Preview aspects that you wish to use for your report. Once we’ve defined these individual items we can begin to piece them together into one or multiple FastSteps. To begin creating the FastStep go to Tools > FastSteps > Define. The FastSteps menu will open with options for creating or modifying existing FastSteps.
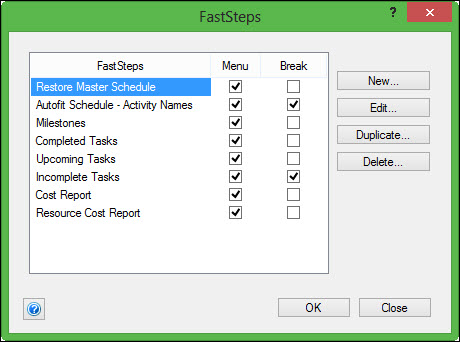
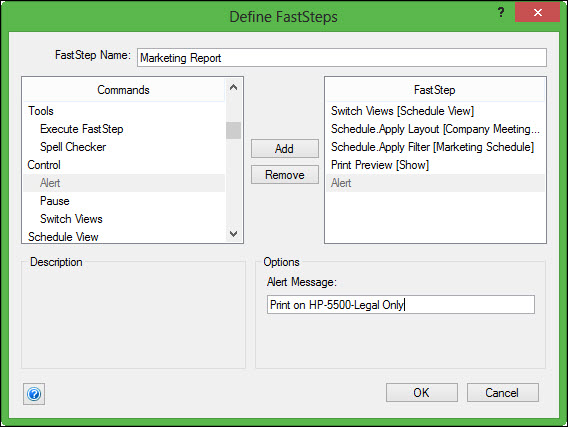
Select New to open the Define FastSteps dialog. Much like when working with Layouts and Filters, the first thing we should do is enter a customized name for the new FastStep. We’ll call this Marketing Report.
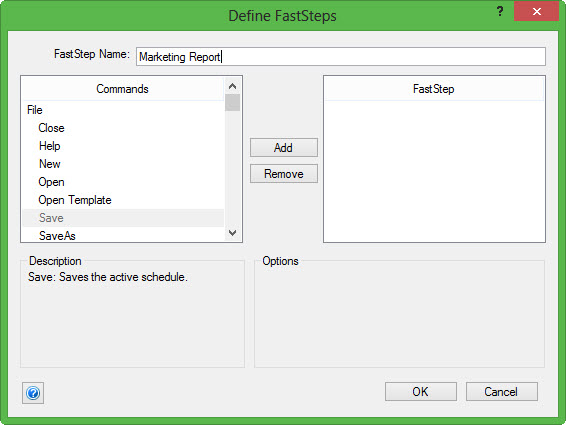
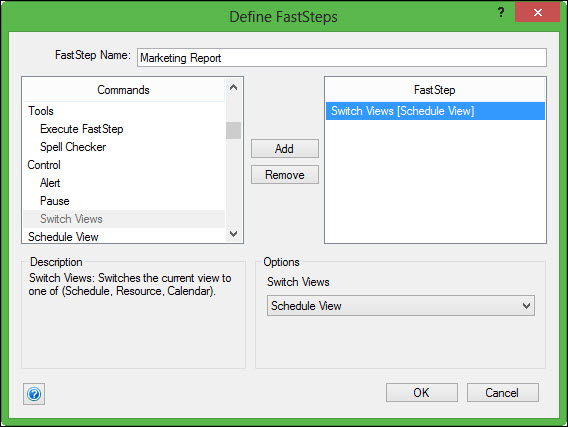
When building a FastStep we can assemble a set of commands that we wish to occur. The first item we’ll add is located under the heading Control – the Switch Views item. Select Switch View then select the Add button to move it to the FastStep list. The Switch View function will automatically switch to the desired view for our report. In this case, we will select the Schedule View.
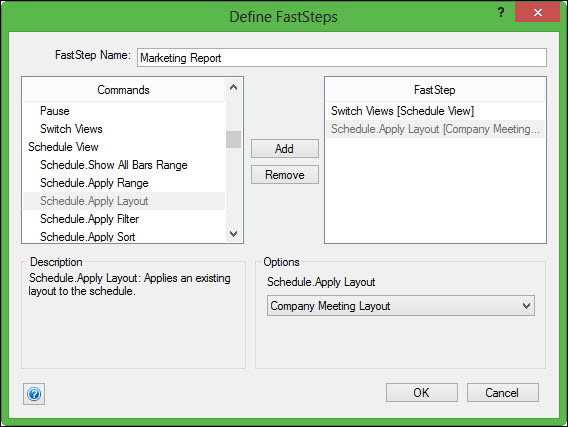
Next, we can add different Layouts and Filters that we wish to switch to. Under the Schedule View heading select Schedule.Apply Layout then select the Add button. By default, when we select the Schedule.Apply Layout it will assume the first layout in the list is what we will switch to. We can change that by using the Options drop down menu and selecting the customized Company Meeting Layout.
We can then repeat this step, this time using the Schedule.Apply Filter. Once again, it will assume the top filter is the one to be used, however we can change this by using the Options drop-down. Here we will select the customized Marketing Schedule filter.

At this point, we have set our FastStep to switch to the Schedule View while applying the Company Meeting Layout and Marketing Schedule Filter. Next, we can switch into our Print Preview to get ready to print the report. To do this we can go to the Printing/Output heading where we can select Print Preview. We will then select the Add button to move this to the FastStep list. We then want to verify that the box labeled Show Print Preview is marked.

Finally, we are going to add in a pop-up alert that will tell users what printer they should use for this report. This is a helpful feature that can help eliminate confusion if you are sharing files with multiple people. The alert can be found under the Control heading. Select Alert followed by the Add button. In the Options box, we can enter the exact message that we wish other users to see.
Lastly, we can select OK to save our FastStep and close the Define FastSteps dialog. Then, select Close to close the FastSteps menu and continue working in your file.
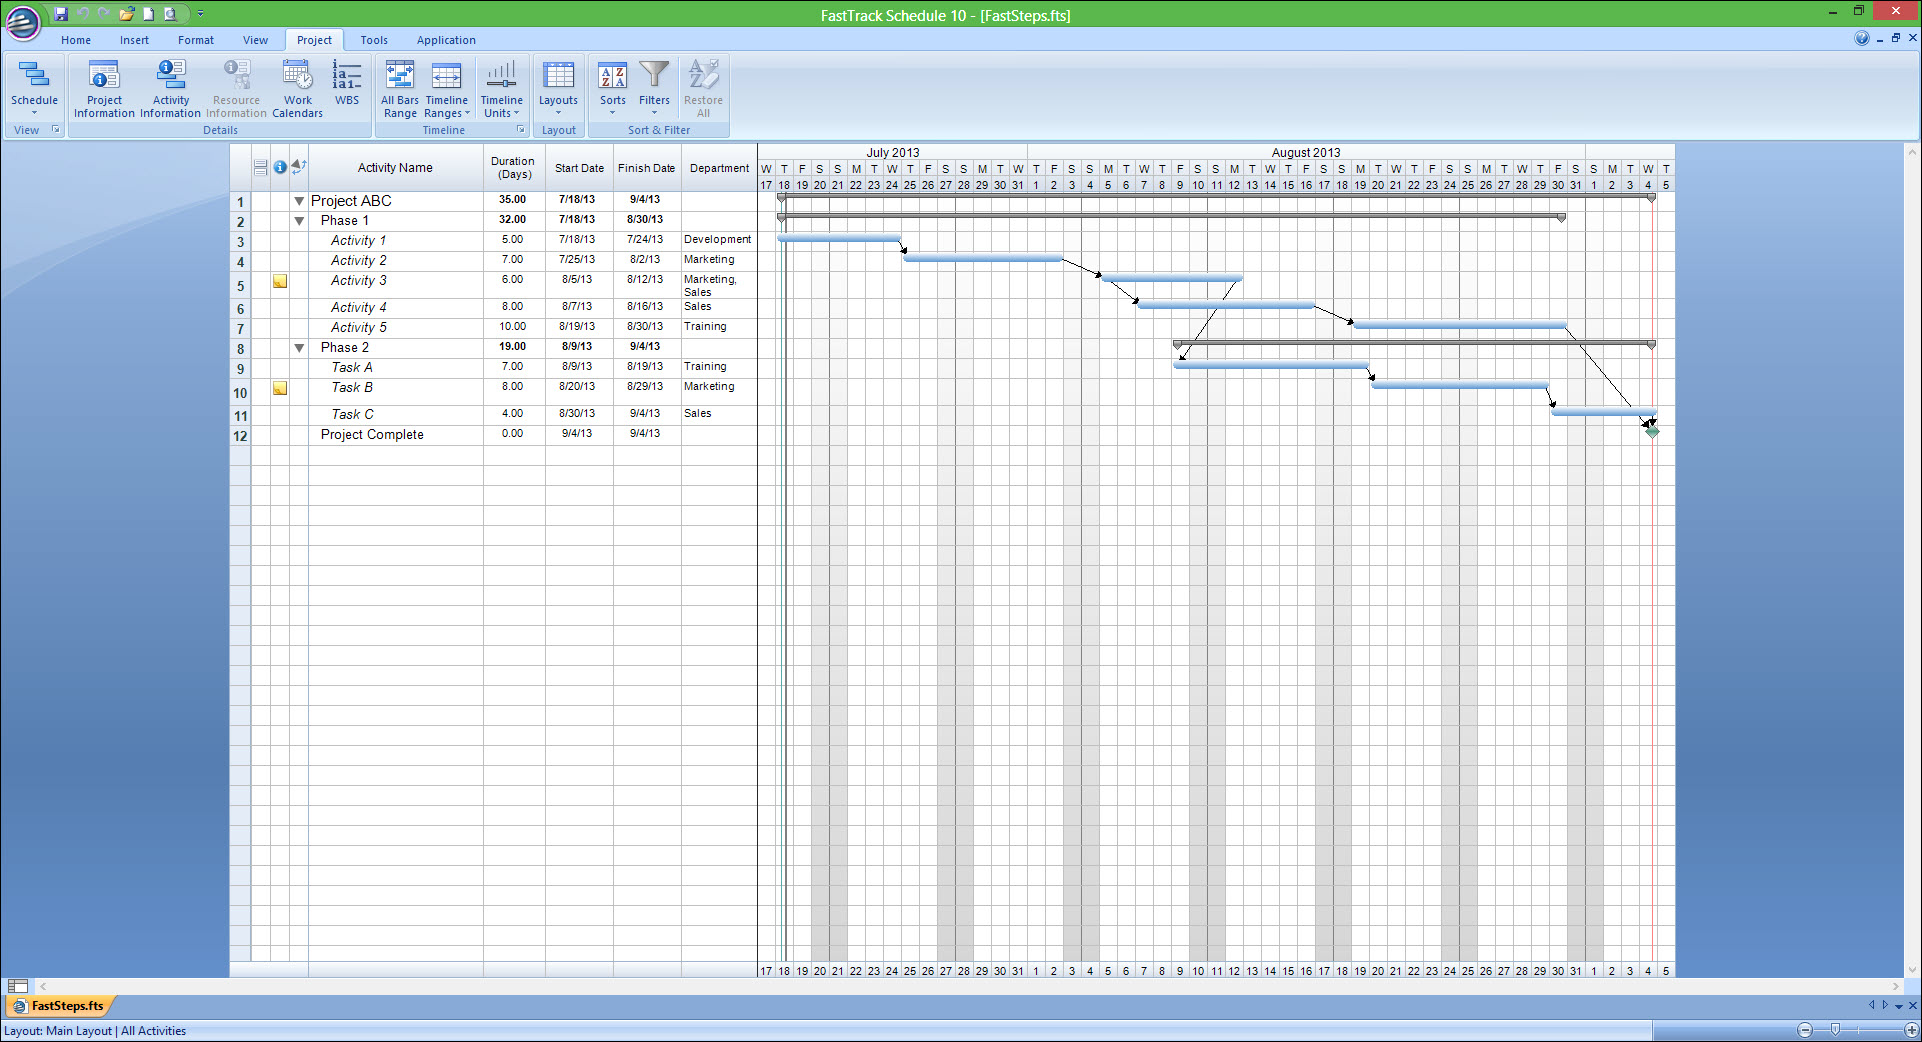
Before we run our Marketing Report FastStep, let’s take a quick glance at what our schedule currently looks like. We can see that the schedule is currently in the Main Layout with an added Department column to show who is responsible for specific tasks in the project.
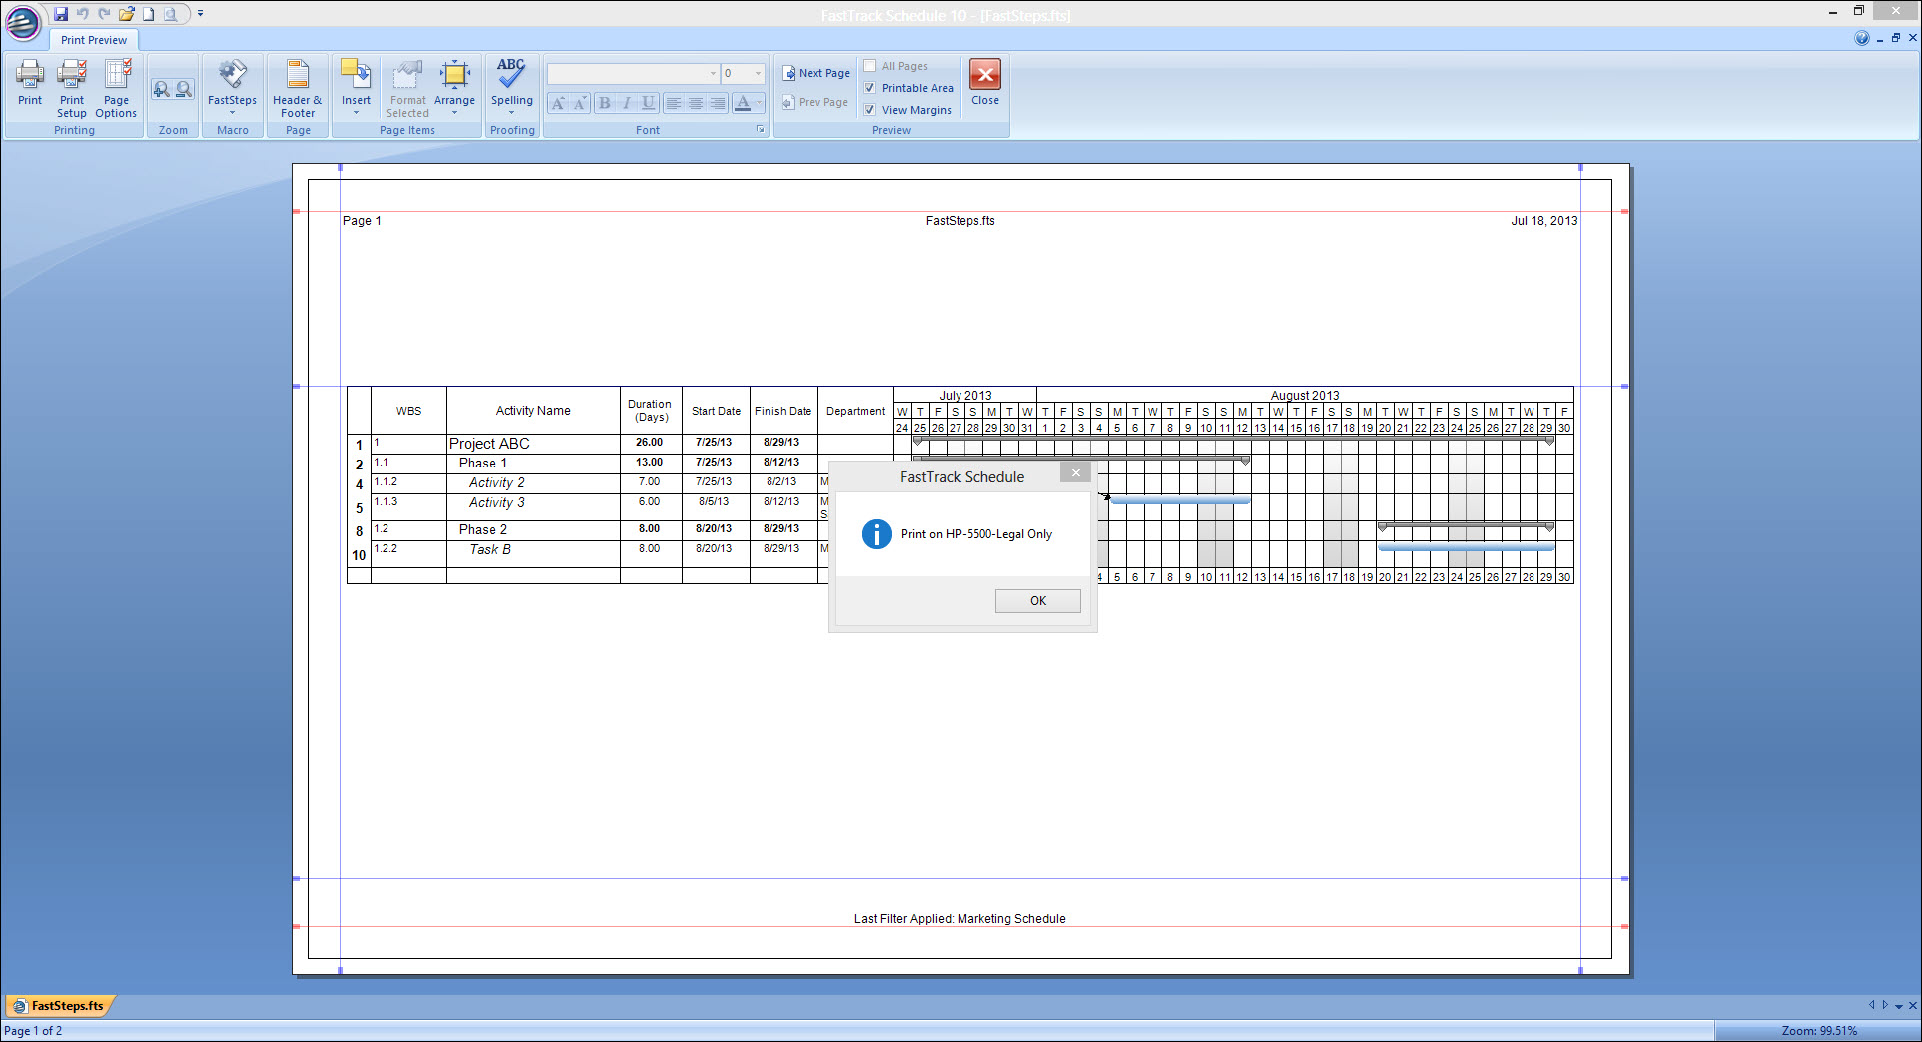
Now that we’ve seen our full schedule it’s time to create a report. Normally we would have to individually apply the Layout, Filter, and Switch into Print Preview. However now with our FastStep, this will occur at once. To run the FastStep, go to Tools > FastSteps > Marketing Report. Almost as soon as we select to run the FastStep, we are switched into the Print Preview with our selected Layout and Filter applied. We also see the Alert message appear indicating which printer to use for this report.
Do you run many reports within your projects? How much time could be saved if you combined the many steps it took to generate the reports into a single FastStep?
