
Printing Methods
Standard
This method has typical formatting abilities. Please note that you’d select this option to print a wall chart schedule on a large format printer, such as a plotter.
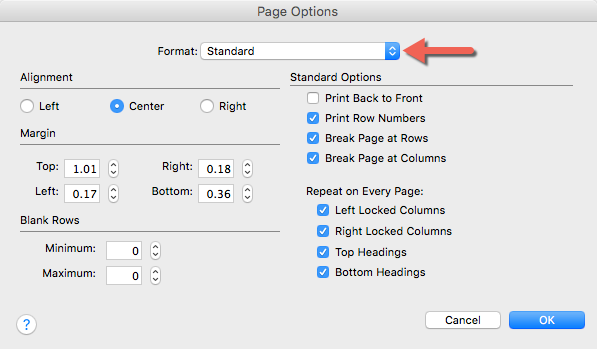
- In Page Options, use the default format, Standard.
- Press OK.
*Interesting fact. Because of FastTrack Schedule’s ability to print Wall Charts, a large international defense organization has used FastTrack Schedule to print schedules on paper rolls 26 feet long. Now that’s a giant schedule!
Wall Chart (Tiled)
Wall charts are kinda awesome, they let you see your schedule in a large way, because lets face it, not all schedules are small and it can help to see the whole picture (project) all at once. The real problem (for most people) is not what the computer can display, but what their printer can print. After all, computers let us scroll every which-way, but our printers only accept certain size paper and etc.
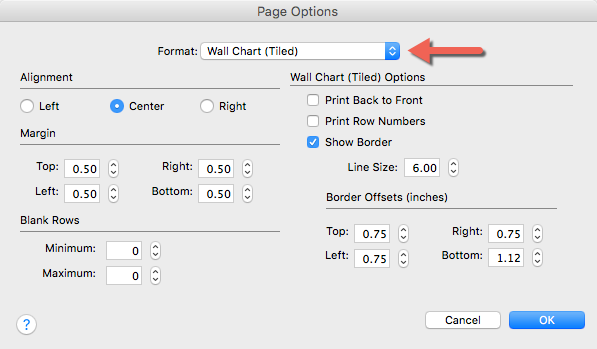
FastTrack Schedule created the Wall Chart (Tiled) method, so that users are not limited by their printer’s paper size. Users can use an inexpensive ink-jet printer to create beautiful, large prints that can be displayed on a wall. Wall Chart (Tiled) break your Wall Chart into smaller sheets of paper that can be pieced together to create a larger Wall Chart.
To take advantage of Wall Chart (Tiled):
- Open Print Preview and select the printer you wish to use and the paper size to use (this can be Letter or Legal sheets, or something else).
- Next, from the Page Options menu, choose Wall Chart (Tiled), then select additional print preferences. Press OK.
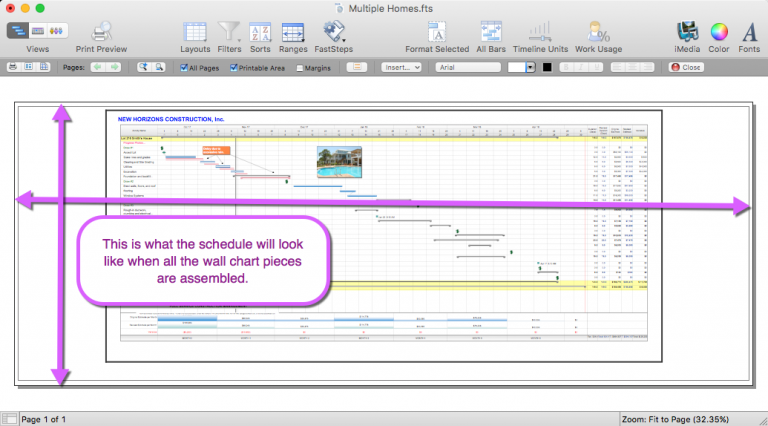
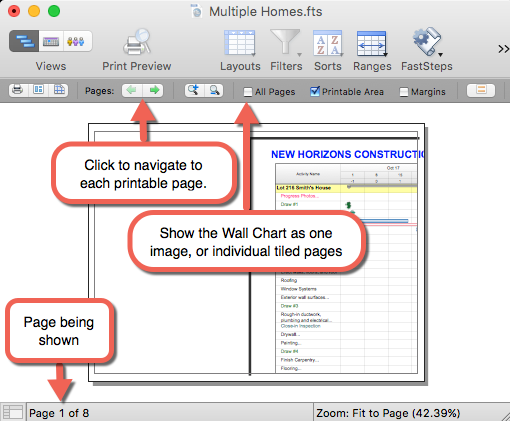
- Print Preview then displays a large image, much larger than the standard letter size page. This is actually a combination of all the individual pages that will be printed, to show how the wall chart will appear when fully assembled.
- To view how many individual pages will print and exactly what each page will look like, de-select the All Pages option from the Print Preview toolbar. Now we can see that the print-out will go from edge to edge on a page, printing first the data columns, and then printing the Timeline Graph on subsequent pages.
Fit to Pages (Width)
With the Fit to Pages (Width) option, FastTrack Schedule will automatically resize your project to fit on a certain number of pages, width-wise. When this resizing occurs, one thing to be aware of is that only the timeline columns (days, weeks, months, etc.) will be re-sized, and all other data columns will appear as it normally does within the Schedule View.
- To enable Fit to Pages (Width) within your schedule, go to Page Options.
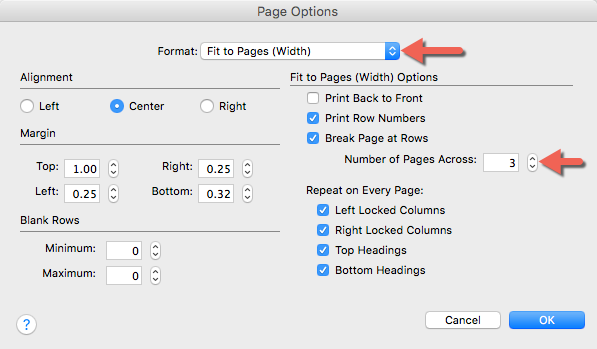
- From the drop-down menu, select the Fit to Pages (Width) option.
- Now, we can select the Number of Pages Across that we wish the project to print on. The default option is 2, however we can set this to any value and FastTrack Schedule will automatically increase or decrease the size of the Timeline Graph to account for this.
- Select OK to close the dialogue and apply the setting.
*Fit to Pages (Width) Reminder.
In our printout, you may notice that it says it will print on 4 pages, even though we selected to print on 3. This is because the Fit to Pages (Width) option can only control the number of pages across (Timeline) that we print on and not the number of pages vertically (rows) that we need to print on. So while we may be able to fit our Timeline onto a single sheet, the total number of rows in our project may still prevent us from reaching a 1 page printout.
Summary | Call for Input
