
In every project we work on some of the most important things that we keep track of are the date and durations when activities need to occur. In FastTrack Schedule 10 we can easily view exactly when these tasks should happen by looking at our Timeline Graph. There are times, however, when we may want to view this information in a different manner. For example, perhaps there is a time when we would like to see those tasks displayed across a traditional calendar. With FastTrack Schedule 10’s Calendar View we can very easily display every task in our project on a calendar.
Normally a calendar may not provide much information, besides when the activity is occurring. However, with FastTrack Schedule 10’s Calendar View we can easily apply different labels to our bars that correspond to any the columns in our project. This allows users to easily show key data of the project while still maintaining that easy-to-use calendar styling.
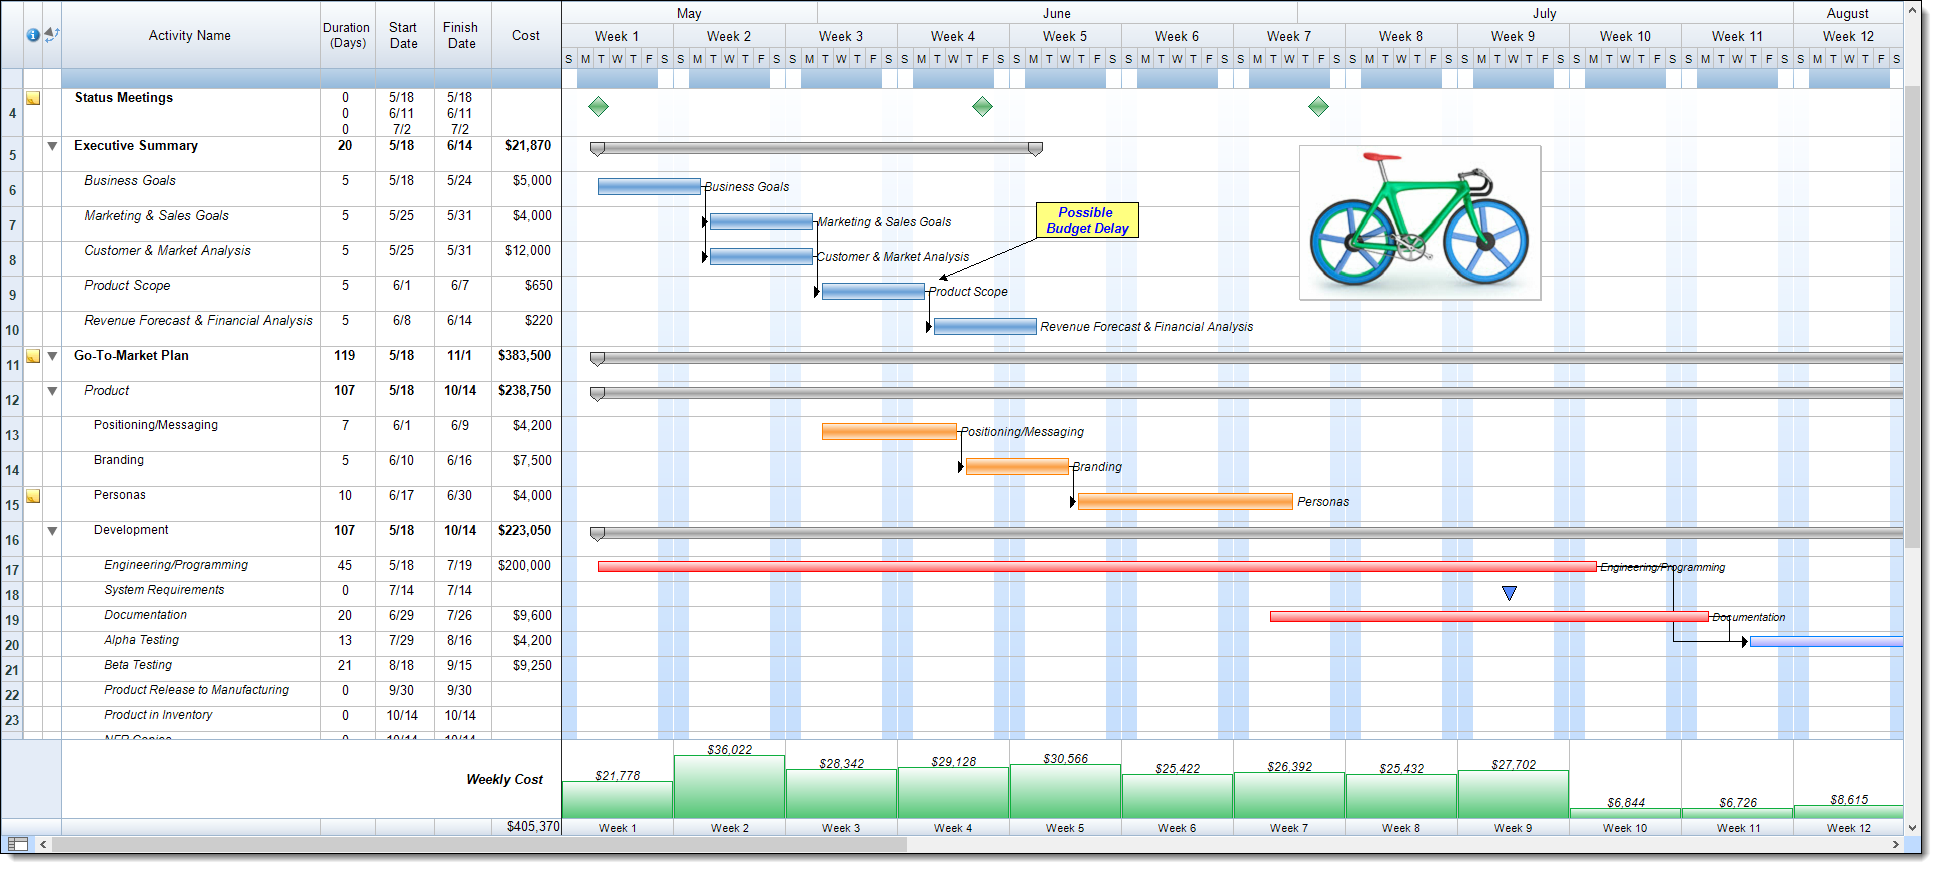
First let’s take a look at how our project looks in the Schedule View. As we can see here, the Schedule View displays key information such as Activity Name, Duration, Start/Finish Date, and Cost. We also see that when looking at the Timeline Graph that we have different bar styles for each section of the project.
Now, let’s take a look at the Calendar View. To switch to this go to Views > Calendar View. Here we can see that our entire project is automatically converted to a calendar format. We still see all of the activities and individual bar styles that we saw in the Schedule View. One thing that we don’t see, however, is the same amount or types of data.
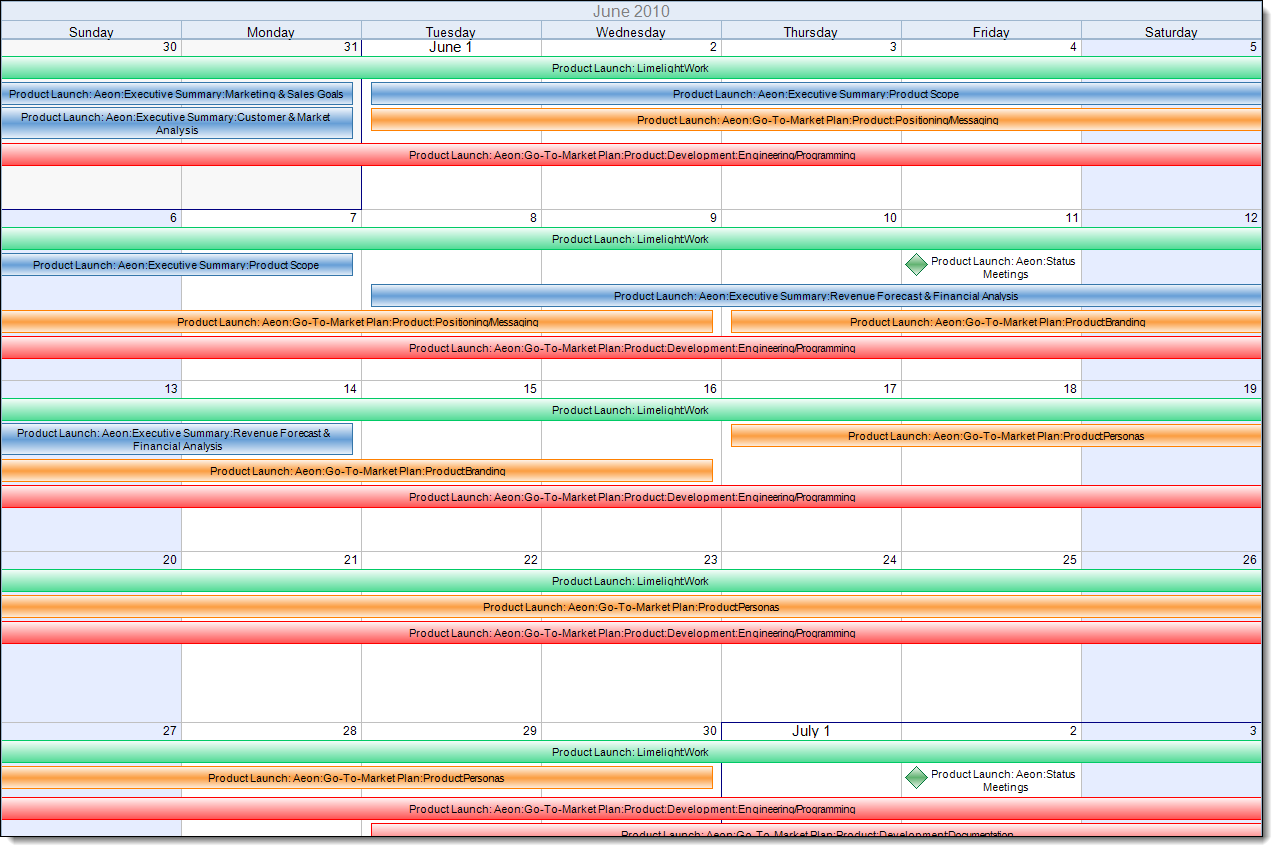
Right now when we look at the Calendar View all we see are the Activity Bars with labels showing the Parent Tree. The Parent Tree tells us the full breakdown of where an activity is located in the project. For example, here we see a task with the label Product Launch: Aeon: Executive Summary: Product Scope. This can be a useful way to view activity information, however given limited space we may want to show just the name of activity.
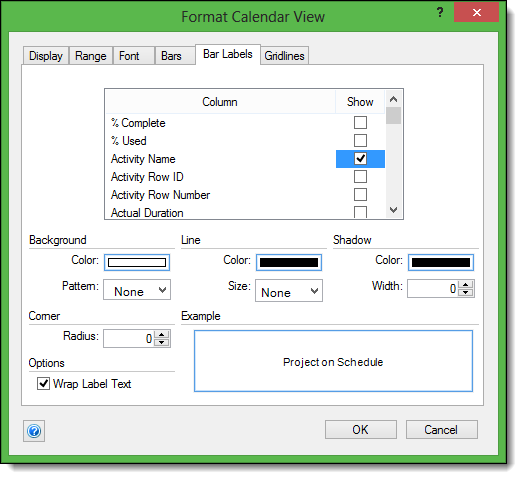
To do this go to Format > View. This will open the Format Calendar View dialogue. From here we can select the tab labeled Bar Labels. The Bar Labels tab will display a long list of available columns that we can use as labels while in the calendar view. First we will remove the Parent Tree as a label by scrolling to this item and removing the check from the Show box. Next, go to Activity Name and place a check in the Show box. After making these changes select OK.
This will apply the changes to our label so we now only see Activity Name displayed in the Calendar View.
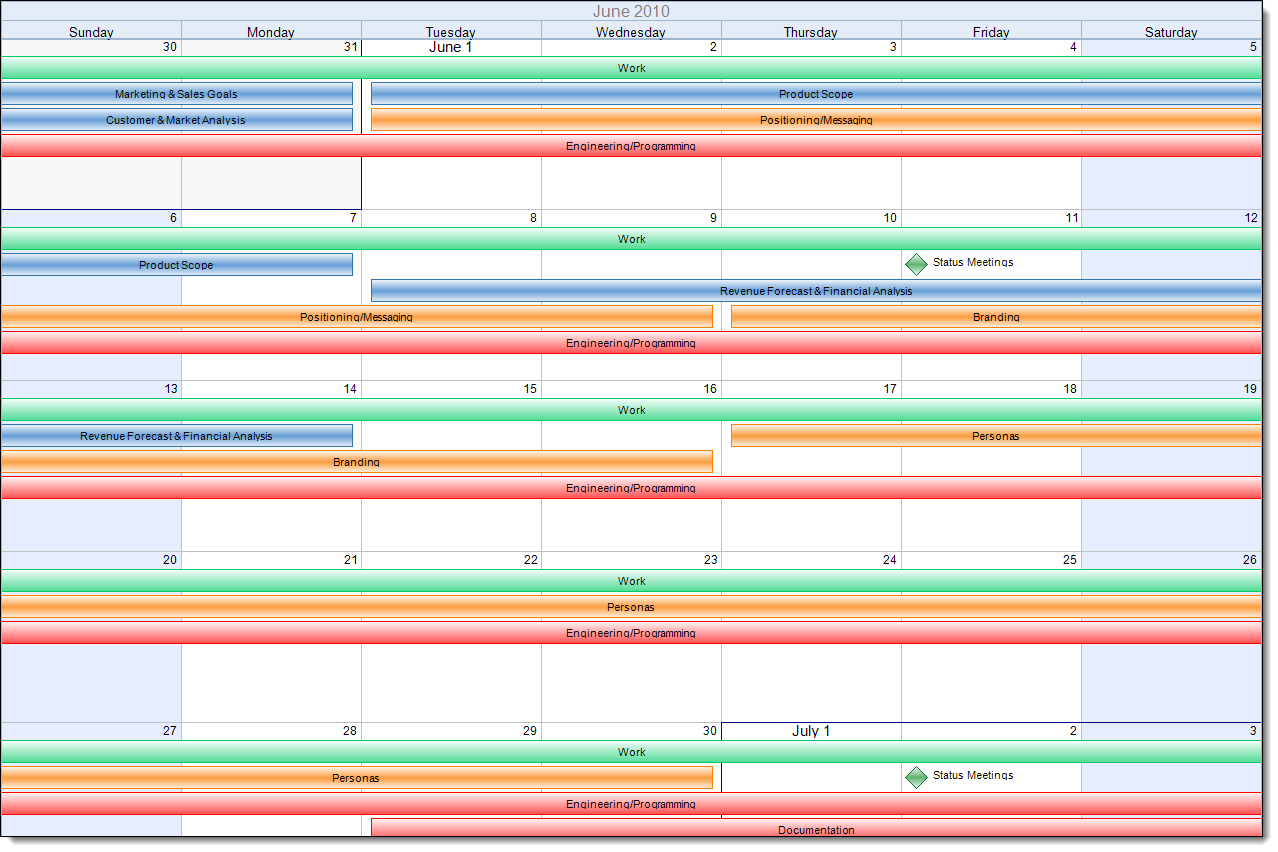
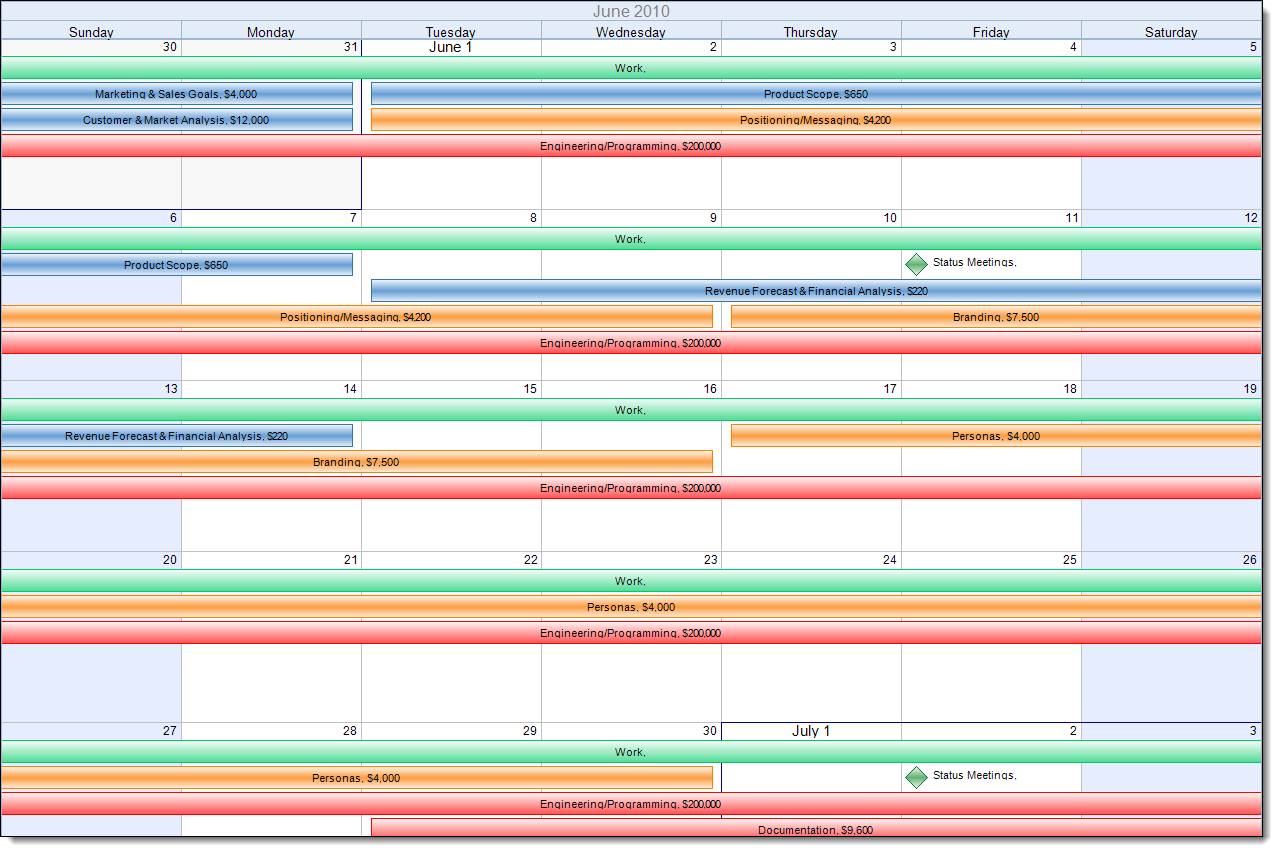
We can see with just that small change we have created a much more simple display within the Calendar View. While in the Calendar View we can actually add any column as a label. For instance if we also wanted to see our costs displayed within the Calendar View, we can easily insert the Cost column as a label.
We can do this in the same way we changed our original label. First open the Format Calendar View dialogue and switch to the Bar Labels tab. From here, browse through the list of available columns. In this case scroll to Cost and place a check in the Show box. You can once again hit OK to save and apply this new label. Now we can easily see our Cost values as a label next to our Activity Name.
Since we can add any column as a label while in the Calendar View, an almost infinite amount of options are available for setting up exactly how you wish your data to be displayed while in the Calendar View. How can showing different columns as labels in the Calendar View allow you to present a simple yet detailed calendar of your projects?
